16 Halloween Treats Kids Can Make (Almost) All by Themselves
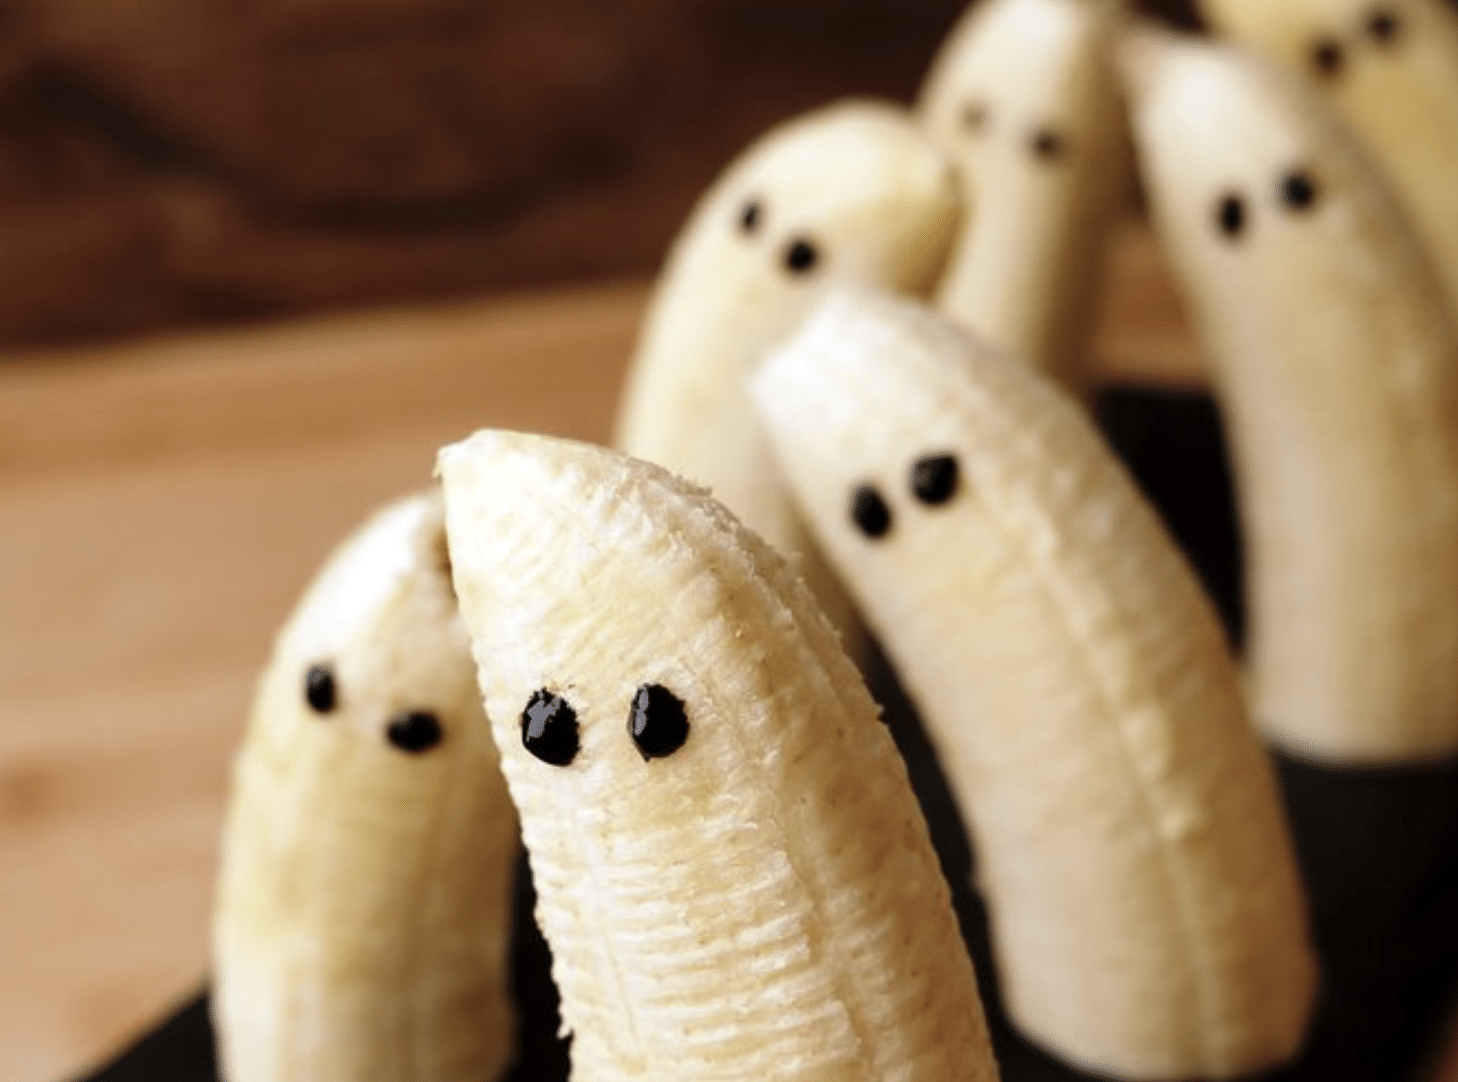
Halloween treats built by kids never look like the photos online, and that’s exactly why they’re worth making. A lopsided banana ghost that a five-year-old made alone means more to that five-year-old than a perfect cookie an adult decorated.
Every treat on this list is built around a real kid job, with the grown-up steps kept small and marked. Most need no oven at all, and the few that involve melting chocolate put that step in adult hands.
Age ranges are rough guides, since kids develop fine motor skills at different speeds. They’re counted down to our favorite all-in-one project, and number one works just as well at a kitchen table as it does in a classroom.
16. Banana Ghosts
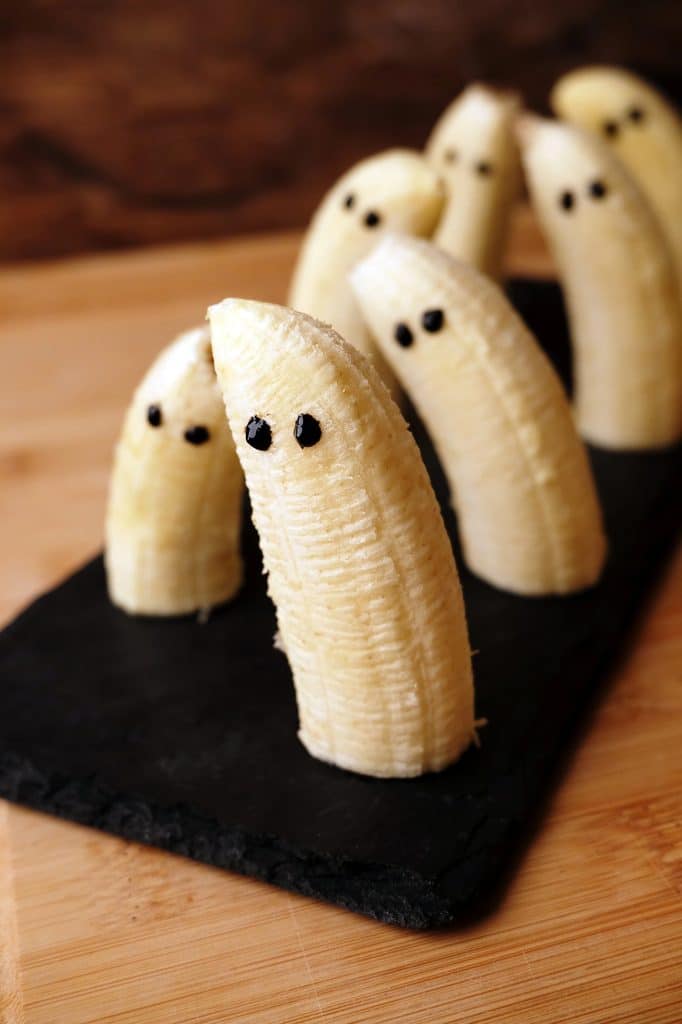
A peeled banana half standing on its cut end, with chocolate chip eyes and a mouth. It’s the easiest treat on this list and one of the few that’s just fruit.
Good for: roughly ages 3 and up
Kid job: pressing in the eyes and mouth
Grown-up job: peeling and cutting the bananas
What you need (makes 8):
- 4 bananas
- About 24 mini chocolate chips
- Lemon juice (optional, to prevent browning)
How to make it:
- Peel the bananas and cut each in half crosswise.
- Stand each half on its flat cut end on a plate.
- Press two mini chocolate chips in for eyes, pointed side in, and one or two for the mouth.
- Brush lightly with lemon juice if they’ll sit out longer than 20 minutes.
Chocolate chips stick best if the kids press them in firmly and a little bit sideways. Pair this one with a sheet from our Halloween coloring pages collection and you have a full afternoon activity.
15. Clementine Pumpkins
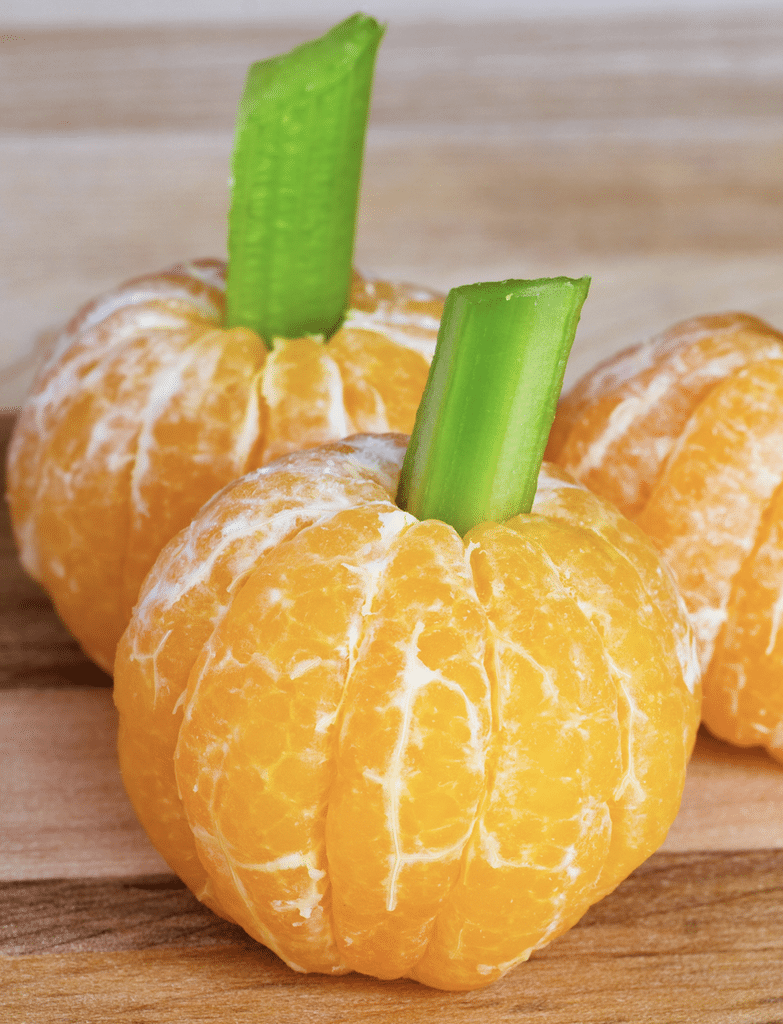
Peeled clementines with a tiny piece of celery poked into the top for a stem. A whole platter takes about ten minutes.
Good for: roughly ages 4 and up
Kid job: peeling and adding the stems
Grown-up job: cutting the celery
What you need (makes 10):
- 10 clementines or small mandarins
- 1 celery stalk, cut into 1/2-inch sticks
How to make it:
- Start the peel for younger kids by breaking the skin at the top.
- Let them peel the rest and pull off any stringy white bits.
- Push a celery stick gently into the center of the top.
Peeling a clementine takes more finger coordination than it looks, which makes it great practice for the same small muscles that coloring builds up.
14. Cheese Stick Broomsticks
A pretzel stick handle with a fringed piece of cheese for the bristles, tied on with a chive. It’s the savory option kids can put together almost entirely alone.
Good for: roughly ages 5 and up (with safety scissors)
Kid job: fringing the cheese and assembling
Grown-up job: tying the chives for younger kids
What you need (makes 12):
- 6 mozzarella string cheese sticks
- 12 pretzel sticks
- 12 fresh chives (optional)
How to make it:
- Cut each cheese stick in half crosswise.
- Using clean kid-safe scissors or a butter knife, cut slits up from one end of each half to make bristles, stopping about halfway.
- Push a pretzel stick into the uncut end.
- Wrap a chive around the top of the bristles and tie a simple knot, or skip it.
I’ve watched a whole table of first graders go quiet while fringing these. The scissor work is focused enough to calm a room down for a few minutes.
13. Pumpkin Rice Cakes
A plain rice cake spread with orange-tinted cream cheese and given a jack-o’-lantern face made from raisins or chocolate chips. Every face comes out different, which is the fun of it.
Good for: roughly ages 4 and up
Kid job: spreading and making the faces
Grown-up job: mixing the colored cream cheese
What you need (makes 8):
- 8 plain rice cakes
- 8 oz whipped cream cheese
- 2 to 3 drops orange gel food coloring (or 1 drop red plus 2 yellow)
- Raisins or mini chocolate chips for faces
How to make it:
- Stir the food coloring into the cream cheese until it’s evenly orange.
- Hand each child a rice cake and a butter knife or small spreader.
- Let them spread a layer of cream cheese over the top.
- Make triangle eyes, a nose, and a toothy grin with raisins or chips.
Before they start, try letting kids draw their face plan on paper using our jack-o’-lantern coloring pages. The planning step helps kids who get frustrated when a face doesn’t come out the way they pictured.
12. Candy Corn Fruit Parfaits
Clear cups layered with pineapple, mandarin oranges, and whipped topping in candy corn colors. There’s no candy involved, which makes these a good choice when you need something festive that isn’t all sugar.
Good for: roughly ages 3 and up
Kid job: spooning each layer
Grown-up job: opening and draining the cans
What you need (makes 6):
- 1 can (20 oz) pineapple tidbits, drained
- 2 cans (11 oz each) mandarin oranges, drained
- 1 tub (8 oz) frozen whipped topping, thawed
- 6 clear plastic cups
How to make it:
- Set out the three ingredients in separate bowls with spoons.
- Have kids spoon pineapple into the bottom of each cup.
- Add a layer of mandarin oranges.
- Top with a spoonful of whipped topping.
Talk through the order before they start: yellow, then orange, then white. It turns a snack into a small sequencing lesson.
11. Witch Broomsticks
Mini peanut butter cups with a pretzel stick handle, scored along the sides to look like bristles. Two ingredients, no heat, and oddly satisfying.
Good for: roughly ages 6 and up (for the scoring step)
Kid job: unwrapping, inserting the handle, and scoring
Grown-up job: supervising the knife
What you need (makes 12):
- 12 mini peanut butter cups, unwrapped
- 12 pretzel sticks
- A butter knife or plastic knife
How to make it:
- Let the peanut butter cups sit at room temperature for a few minutes so they don’t crack.
- Flip each cup upside down so the wide end sits on the table, then push a pretzel stick gently into the narrow flat end.
- Drag the butter knife lightly down the ridged sides to deepen the bristle lines.
A plastic knife is plenty sharp enough for chocolate. For nut-free classrooms, skip this one or use a nut-free chocolate cup.
10. Mummy Graham Crackers
Graham cracker rectangles covered in stripes of white frosting with two candy eyes peeking through. Messier stripes look more like bandages, so there’s no wrong way to do it.
Good for: roughly ages 4 and up
Kid job: placing eyes and piping stripes
Grown-up job: filling the frosting bags
What you need (makes 12):
- 6 full graham cracker sheets, broken in half
- 1 cup white frosting
- 24 candy eyeballs
- Small zip-top bags
How to make it:
- Spoon frosting into small zip-top bags and snip a tiny corner off each.
- Have kids set two candy eyes near the top of each cracker first.
- Let them squeeze frosting back and forth across the cracker, going around the eyes.
Squeezing a frosting bag builds hand strength the same way playdough does. Give each child their own small bag, since sharing one leads to arguments.
9. Marshmallow Ghost Pops
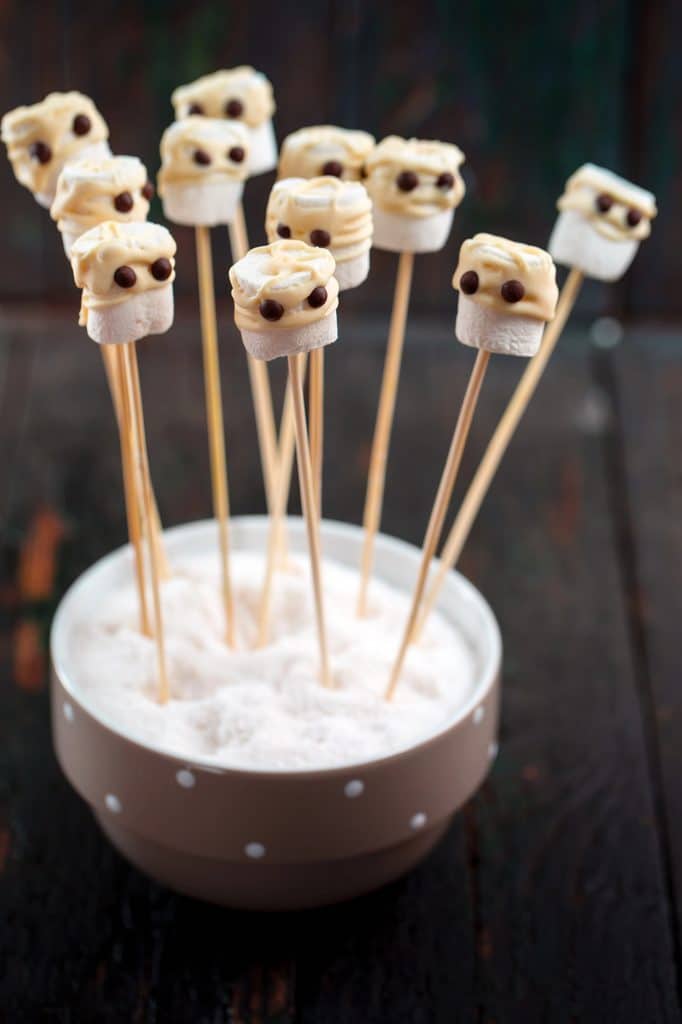
Big marshmallows on pretzel sticks, dipped in white coating, with mini chocolate chip faces. The stick gives little hands something to hold while they decorate.
Good for: roughly ages 4 and up
Kid job: adding faces and holding pops while they set
Grown-up job: melting the coating and dipping
What you need (makes 16):
- 16 large marshmallows
- 16 pretzel sticks
- 10 oz white candy melting wafers
- Mini chocolate chips
How to make it:
- Push a pretzel stick into the flat end of each marshmallow.
- Melt the wafers in the microwave in 30-second bursts, stirring each time.
- An adult dips each marshmallow, letting the extra drip off.
- Kids press on chocolate chip eyes and an oval mouth right away, before the coating sets.
- Stand the pops upright in a cup of dry rice or lay them on wax paper for 15 minutes.
Melted coating can get hotter than it feels, so keep the bowl on the adult side of the table.
8. Caramel Apple Slices, the Honest Entry
This is the treat on the list that needs the most adult help, and it’s worth being upfront about that. Kids love it, but the knife work and warm caramel both belong to a grown-up.
What kids can do is the fun part: the toppings. Apple rounds on sticks, drizzled with caramel, then covered in sprinkles by very serious decorators.
Good for: roughly ages 5 and up, with an adult doing the cutting and caramel
Kid job: adding toppings
Grown-up job: slicing, inserting sticks, melting and drizzling caramel
What you need (makes about 16):
- 3 large apples
- 16 craft sticks
- 1 cup caramels, unwrapped, plus 1 tablespoon milk
- Toppings: sprinkles, mini chocolate chips, crushed graham crackers
- 1 cup lemon-lime soda or water with lemon juice
How to make it:
- Slice the apples crosswise into rounds about 1/2 inch thick and remove the seeds with a small cookie cutter or knife.
- Soak the slices in the soda for 3 to 5 minutes to prevent browning, then pat completely dry.
- Push a craft stick into the edge of each slice.
- Microwave the caramels and milk about 90 seconds, stirring every 30 seconds, until smooth. Let it cool a minute.
- Drizzle caramel over each slice, then let kids add toppings.
If your group is young or the adult-to-kid ratio is thin, save this one for home and choose something from the top half of this list for a classroom.
7. Ghost Strawberries
Strawberries dipped in white chocolate with a little tail of coating at the bottom and chocolate chip eyes. They’re the fanciest-looking thing kids can finish on their own after one adult step.
Good for: roughly ages 4 and up
Kid job: adding the faces
Grown-up job: washing, drying, and dipping
What you need (makes 16):
- 16 large strawberries
- 8 oz white chocolate chips or white melting wafers
- Mini chocolate chips
How to make it:
- Wash the strawberries and dry them completely. Any water makes the chocolate turn grainy.
- Melt the white chocolate in 30-second bursts, stirring each time.
- An adult dips each berry by the leaves, then drags the tip across wax paper to form a ghost tail.
- Kids press on two chocolate chip eyes and a mouth right away.
- Chill about 15 minutes to set.
Eat these the same day. Chocolate-dipped strawberries tend to weep once they sit overnight.
6. Build-Your-Own Trail Mix Bar
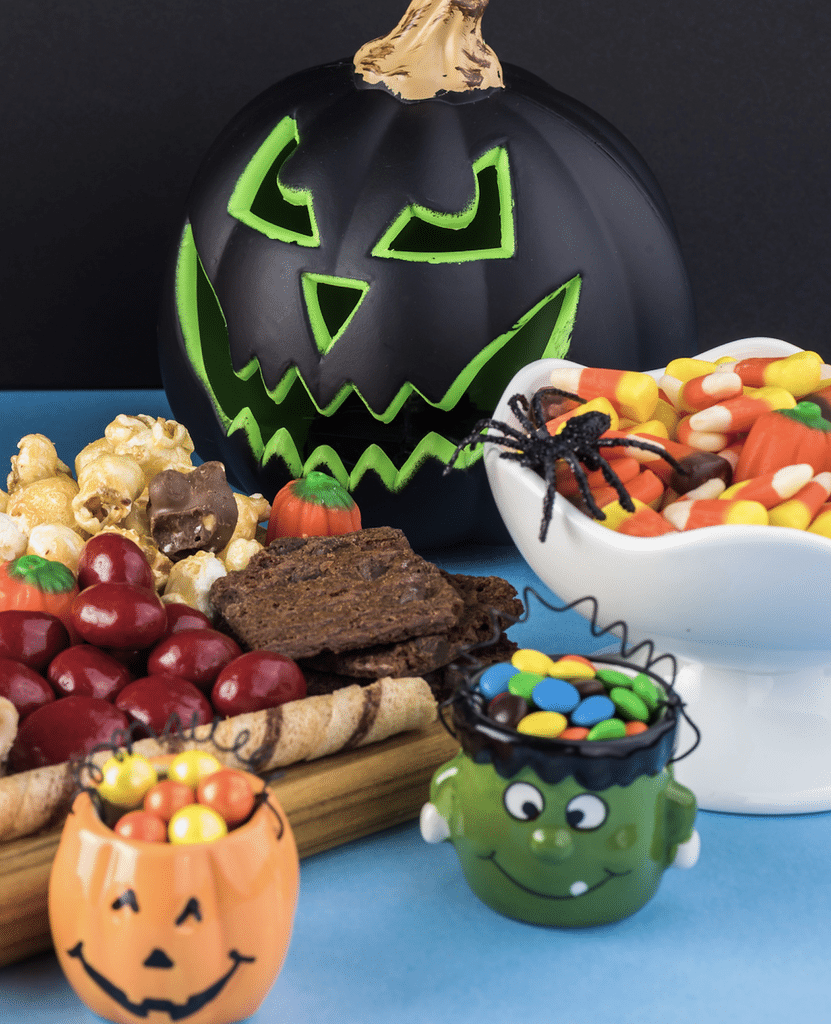
A row of bowls, a scoop for each, and a bag for every kid. This is the treat where each child makes their own choices, which is half the appeal.
Good for: roughly ages 4 and up
Kid job: everything, including choosing and scooping
Grown-up job: setting out bowls and checking allergies
What you need (serves about 12):
- 2 cups candy corn
- 2 cups mini pretzels
- 2 cups cereal squares
- 2 cups popped popcorn
- 1 cup mini marshmallows
- Small bags or paper cups
How to make it:
- Set each ingredient in its own bowl with a scoop or spoon.
- Give each child a bag and let them add one scoop from each bowl, or skip what they don’t like.
- Twist the bags shut or fold the cups over.
A quick honest note here: before you plan any of these for a school party, check the classroom food policy. Many schools require store-bought, packaged treats because of allergies, and some ban food at parties entirely.
When I taught, our parties were store-bought only, so a bar like this only worked when every ingredient came in its own sealed package and the kids filled their bags at the party. Ask the teacher before planning it. Leave peanuts out entirely, and remember that popcorn and small candies are choking risks for kids under about 4.
5. Witch Hat Cookies
A fudge-striped shortbread cookie flipped upside down, a dab of frosting, and a cone-shaped chocolate candy on top. The stripes become the hat brim.
Good for: roughly ages 4 and up
Kid job: every step
Grown-up job: unwrapping candies for the youngest
What you need (makes 24):
- 24 fudge-striped shortbread cookies
- 24 cone-shaped chocolate candies, unwrapped
- 1/4 cup orange or green frosting in a small bag with a snipped corner
How to make it:
- Flip each cookie so the chocolate bottom faces up.
- Pipe a small dot of frosting in the center hole.
- Press a chocolate candy on top.
- Pipe a thin ring of frosting around the base of the candy for a hat band.
Set this one up as an assembly line: cookies, frosting, candies. Kids love running a station, and it teaches taking turns. Our classroom activity ideas use the same station setup for crafts.
4. Spiderweb Cupcakes
White-frosted cupcakes with chocolate circles piped on top and a toothpick dragged outward to make a web. It’s a real decorating technique, and kids can do it.
Good for: roughly ages 6 and up
Kid job: piping circles and dragging the web
Grown-up job: frosting the cupcakes and filling the bags
What you need (makes 12):
- 12 cupcakes, homemade or store-bought, frosted smooth with white frosting
- 1/3 cup chocolate frosting, warmed 10 seconds, in a small zip-top bag with a tiny corner snipped
- Toothpicks
- Plastic spider rings (optional, for decoration only)
How to make it:
- Pipe three circles on each cupcake, one inside the other.
- Drag a toothpick from the center out to the edge, six or eight times around.
- Add a spider ring on top if using.
Plastic spider rings are a choking hazard for small children, so take them off before younger kids eat. Practicing the web on paper first with a marker, then on a cupcake, gives nervous decorators confidence. It’s the same idea behind coloring activities for kids ready for a challenge.
3. Pretzel Rod Wands
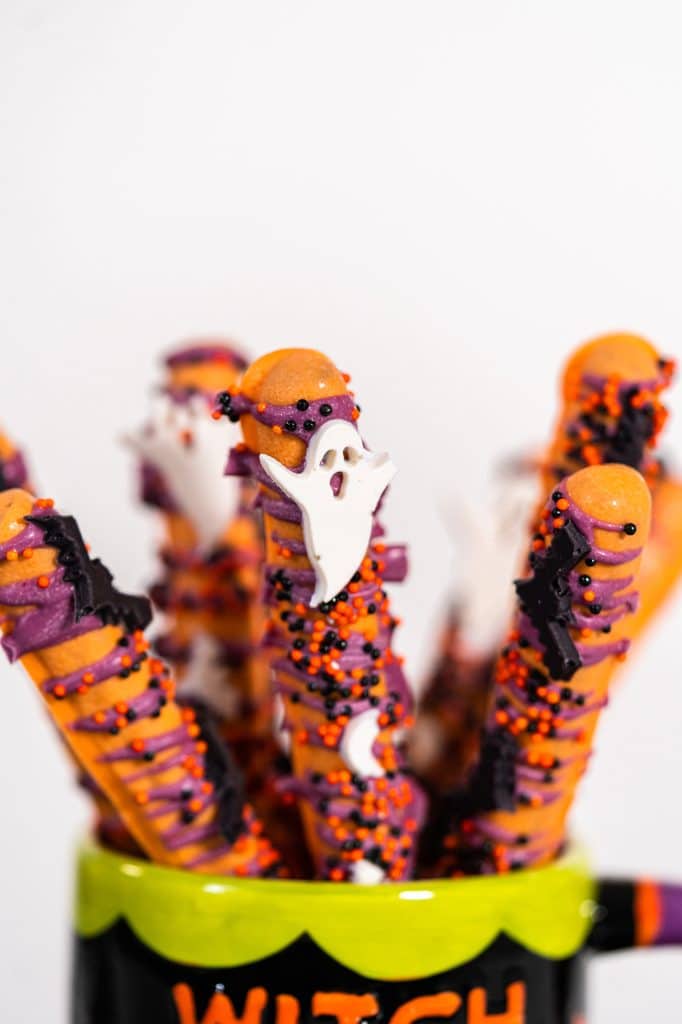
Pretzel rods dipped in colored candy coating and covered in sprinkles. The sprinkle step is wonderfully messy, so set it up over a tray.
Good for: roughly ages 4 and up
Kid job: shaking sprinkles and standing the wands to dry
Grown-up job: melting and dipping
What you need (makes about 24):
- 1 bag (10 oz) pretzel rods
- 12 oz candy melting wafers
- 1/2 cup Halloween sprinkles
How to make it:
- Melt the wafers in a tall mug in 30-second bursts, stirring each time.
- An adult dips each rod about two-thirds deep and hands it to a child.
- The child holds it over a rimmed tray and shakes sprinkles all over the coating.
- Stand wands in a glass with dry rice in the bottom, or lay flat on wax paper, to set for 30 minutes.
Kids can wrap these in cellophane bags to give as gifts, which makes them a good choice for a take-home treat. A boredom-buster coloring session fills the 30-minute wait while they dry.
2. Spider Crackers
Two round crackers sandwiched with a spread, eight pretzel legs, and two candy eyes. Kids can build an army of these with almost no help.
Good for: roughly ages 4 and up
Kid job: every step
Grown-up job: breaking pretzel sticks for younger kids
What you need (makes 12):
- 24 round butter crackers
- About 1/2 cup sunflower seed butter, cream cheese, or peanut butter
- 48 thin pretzel sticks, broken in half (96 legs)
- 24 candy eyeballs
How to make it:
- Spread a layer of filling on 12 of the crackers.
- Push four pretzel legs into the filling on each side.
- Top with a second cracker and press gently.
- Stick two candy eyes on top with a small dab of filling.
Counting out eight legs per spider sneaks in some math practice for younger kids. I’ve used this exact treat as a counting lesson, along with the kind of activities that help kids learn numbers.
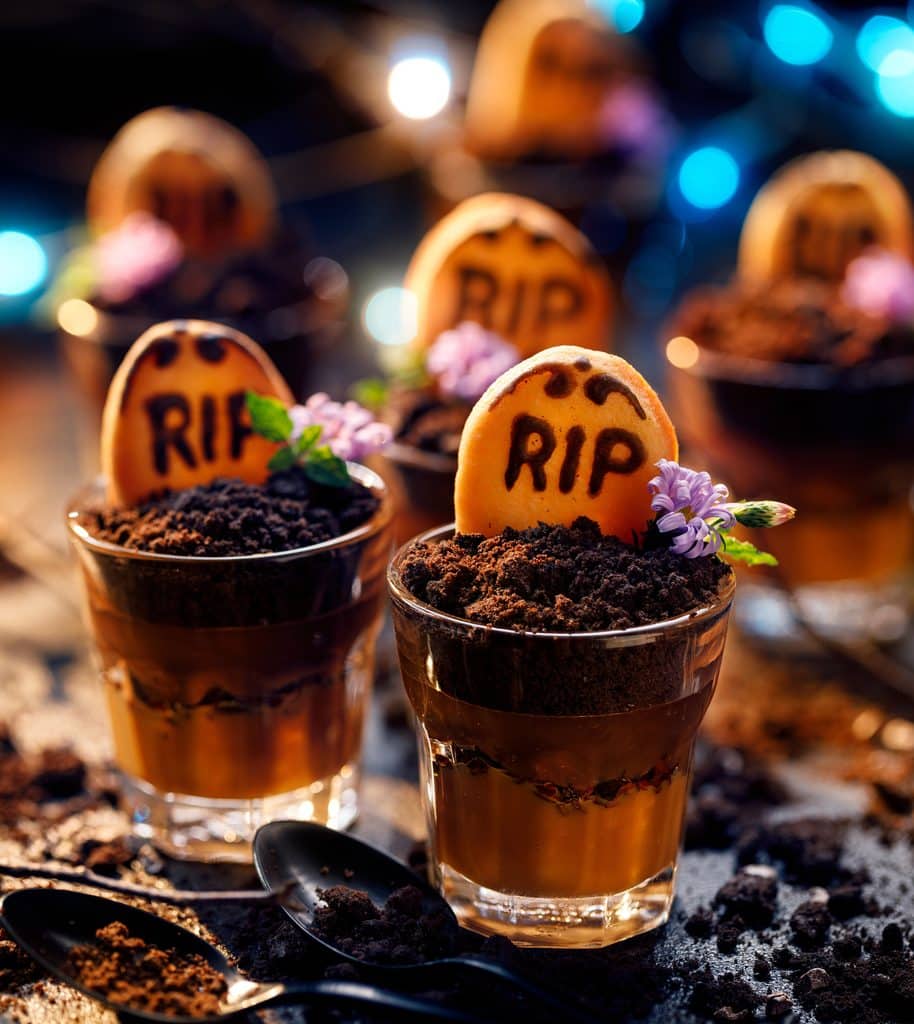
1. Graveyard Pudding Cups
Our top pick puts every kid in charge of their own tiny graveyard. Chocolate pudding in a clear cup, crushed cookie dirt on top, a cookie tombstone, and gummy worms crawling out.
It’s the kid-sized version of the famous graveyard dirt cake, and it works better for kids for a simple reason: each child owns the whole project from start to finish. There’s no waiting for a turn at the big dish.
Good for: roughly ages 4 and up
Kid job: crushing, spooning, decorating, and writing on tombstones
Grown-up job: making the pudding
What you need (makes 6):
- 1 box (3.9 oz) instant chocolate pudding
- 2 cups cold milk
- 15 chocolate sandwich cookies
- 6 oval or rectangular cookies for tombstones, such as oval peanut butter sandwich cookies or shortbread fingers (skip peanut butter ones for nut-free groups)
- Black or white icing pens
- 12 to 18 gummy worms
- 6 clear plastic cups
How to make it:
- An adult whisks the pudding and milk for 2 minutes and lets it set 5 minutes.
- Kids crush the sandwich cookies in a sealed zip-top bag by pressing and rolling with their hands or a rolling pin.
- Kids spoon pudding into their cups and sprinkle a thick layer of cookie dirt on top.
- Using icing pens, kids write a name or “RIP” on their tombstone cookie and let it dry for a minute.
- Push the tombstone into the dirt and add gummy worms, some crawling out over the edge.
Crushing cookies in a bag is the favorite step for almost every child, and it’s a safe way to let them be as rough as they like.
Writing on the tombstone is great for early writers. Even kids who can only manage their initials or a scribbled “Boo” feel proud of the result. Older kids enjoy coming up with silly epitaphs for their stuffed animals or the family pet.
Set a little tray of extra decorations nearby, like candy pumpkins or plastic spiders for display only, and let kids design their graveyard however they want. It’s a treat and an art project at the same time.
After the Treats
Kitchen projects like these tend to leave kids wound up and sticky. A calm activity afterward helps everyone reset, and a stack of quiet-time coloring ideas is a good wind-down while the pretzel wands dry. Our guide on how coloring can calm an overstimulated kid covers why that works.
If you want to keep the theme going, our free printable coloring pages include plenty of fall and Halloween designs. Let kids color a picture of the treat they made and hang it on the fridge next to the recipe.