How to Draw Spiderman – Drawing Turorials and Coloring Tips
Have you ever wondered how to capture the dynamic and powerful presence of Spiderman in your drawings? Whether you’re a comic book enthusiast or just a fan of the friendly neighborhood superhero, mastering the art of drawing Spiderman can be an exciting challenge. But fear not, because we’re here to guide you through step-by-step drawing tutorials and provide coloring tips to bring this iconic character to life on paper.
From his muscular body to his intricate costume, we’ll break down the process of drawing Spiderman into easy-to-follow steps. Discover the secrets to creating Spiderman’s dynamic pose, capturing his unique facial expression, and adding realism to his anatomical features. Unleash your artistic skills with our expert guidance and create your very own Spiderman masterpiece!
Key Takeaways:
- Learn how to draw Spiderman step by step with our comprehensive drawing tutorials.
- Add depth and dimension to your Spiderman drawing by paying attention to details like muscles and anatomy.
- Master the art of coloring Spiderman’s iconic costume using shading and highlighting techniques.
- Explore the process of inking and outlining to give your Spiderman drawing a polished look.
- Showcase your Spiderman artwork and share it with fellow fans to receive appreciation and recognition.
The Basics of Drawing Spiderman
To start your Spiderman drawing, it’s essential to establish a solid foundation. Follow these step-by-step instructions to create your own amazing Spiderman artwork.
Step 1: Framework
Begin by drawing an oval shape for Spiderman’s head. Next, add a muscular torso by sketching a larger, elongated oval shape beneath the head. Connect the head and torso with a neck to give Spiderman a more natural appearance.
Step 2: Muscularity and Dynamics
Spiderman is known for his athleticism, so make sure to emphasize his muscular and dynamic physique. Add long, muscular arms and legs to the torso, paying attention to proportionality and fluidity in the lines. This will make Spiderman look powerful and ready for action.
Step 3: Refining the Details
Erase any unnecessary guidelines and start adding details to your Spiderman drawing. Focus on the hands, eyes, and iconic web lines on the costume. Spiderman’s hands are usually depicted with exaggerated fingers to convey his agility and flexibility.
Tips for success: When drawing the web lines, use curved and intersecting lines to create a sense of depth and intricacy. Don’t forget to give Spiderman expressive eyes to capture his unique personality.
Step 4: Key Features and Final Touches
As you progress, pay attention to Spiderman’s iconic features, such as the spider logo on his chest and the webbing on his costume. Take your time to add these details accurately, ensuring they enhance the overall look of your drawing.
Finally, review your artwork and make any necessary adjustments or refinements. This is the stage where you can add shading or additional details to make your Spiderman drawing truly stand out.
Remember, practice makes perfect! Keep refining your skills by exploring different poses and perspectives to create your own unique Spiderman illustrations.
Adding Details to Spiderman’s Body
Once the basic structure of Spiderman’s body is in place, it’s time to bring the character to life by adding intricate details. These details will help emphasize Spiderman’s strength, agility, and iconic features. Here are some helpful tips and techniques to enhance your Spiderman illustrations:
Defining Muscles with Curved Lines
Spiderman is known for his athletic physique, defined by muscular contours. To capture his strength and agility, use curved lines to outline and define the muscles. This will add depth and dimension to your drawing, making Spiderman appear more dynamic and realistic.
Proportions and Anatomy
Pay close attention to the proportions and anatomy of Spiderman’s body. Study reference images or comics to ensure accuracy in your illustration. Understanding the placement and proportions of key body parts, such as the arms, legs, and torso, will help create a lifelike depiction of the character.
Adding Small Details
Don’t forget to include smaller details that make Spiderman instantly recognizable. One such detail is the insignia on his chest, commonly known as the spider emblem. Carefully draw this symbol, making sure it is placed correctly and accurately represents Spiderman’s iconic logo. Additionally, don’t forget to sketch the intricate web patterns on Spiderman’s costume, giving it the signature look.
By incorporating these techniques, you can elevate your Spiderman illustrations to the next level, capturing the essence of the beloved superhero. Let your creativity flow and have fun perfecting the details that make Spiderman truly unique.
To provide a visual guide, here is an example of Spiderman’s body structure with added details:
| Description | Image |
|---|---|
| Spiderman’s body structure with added details |  |
Drawing Spiderman’s Face and Mask
Spiderman’s face and mask are iconic features of the character. To capture Spiderman’s unique expression, follow these step-by-step drawing tutorials and art tips:
- Start by drawing an oval for the head. This will serve as the foundation for Spiderman’s face.
- Sketch the eyes, which are typically large and expressive. Pay close attention to the shape and placement of the eyes to capture Spiderman’s intense gaze.
- Add the web pattern on the mask by carefully drawing straight lines and curves. This intricate detailing gives Spiderman’s mask its distinctive look.
To enhance your drawing and make Spiderman come to life, consider the following art tips:
- Use shading techniques to add depth and dimension to the mask. Lightly shade areas that would be in shadow, such as the eye sockets or beneath the mask’s webbing.
- Employ cross-hatching or stippling methods to create texture and simulate the fabric of the mask.
- Experiment with different line weights to emphasize certain areas and contours.
Remember, practice makes perfect! Don’t be afraid to refine and adjust your drawing as you progress. With dedication and these art tips, you’ll be able to recreate Spiderman’s face and mask with accuracy and style.

Inking and Outlining the Drawing
Once the pencil sketch is complete, it’s time to bring your Spiderman drawing to life by outlining and defining the lines with a black marker. Inking is an essential step in the drawing process, as it adds depth and dimension to the artwork.
Use a marker with a fine tip to create bold, confident strokes. Start by outlining the main shape of Spiderman’s body, including his muscular torso, arms, and legs. Pay attention to the details and edges to make the lines clean and crisp.
As you ink the drawing, focus on enhancing the contours of the muscles and capturing the intricate web lines on Spiderman’s costume. The bold black lines will make your drawing stand out and give it a polished and finished look.
When inking, it’s important to have a steady hand and work with patience. Take your time to ensure accuracy and precision in your lines. If you make a mistake, don’t worry! Use white-out or a correction pen to fix any errors before proceeding.

By carefully outlining and inking your Spiderman drawing, you will bring it one step closer to completion. The boldness of the black lines will add a professional touch and make your artwork truly pop.
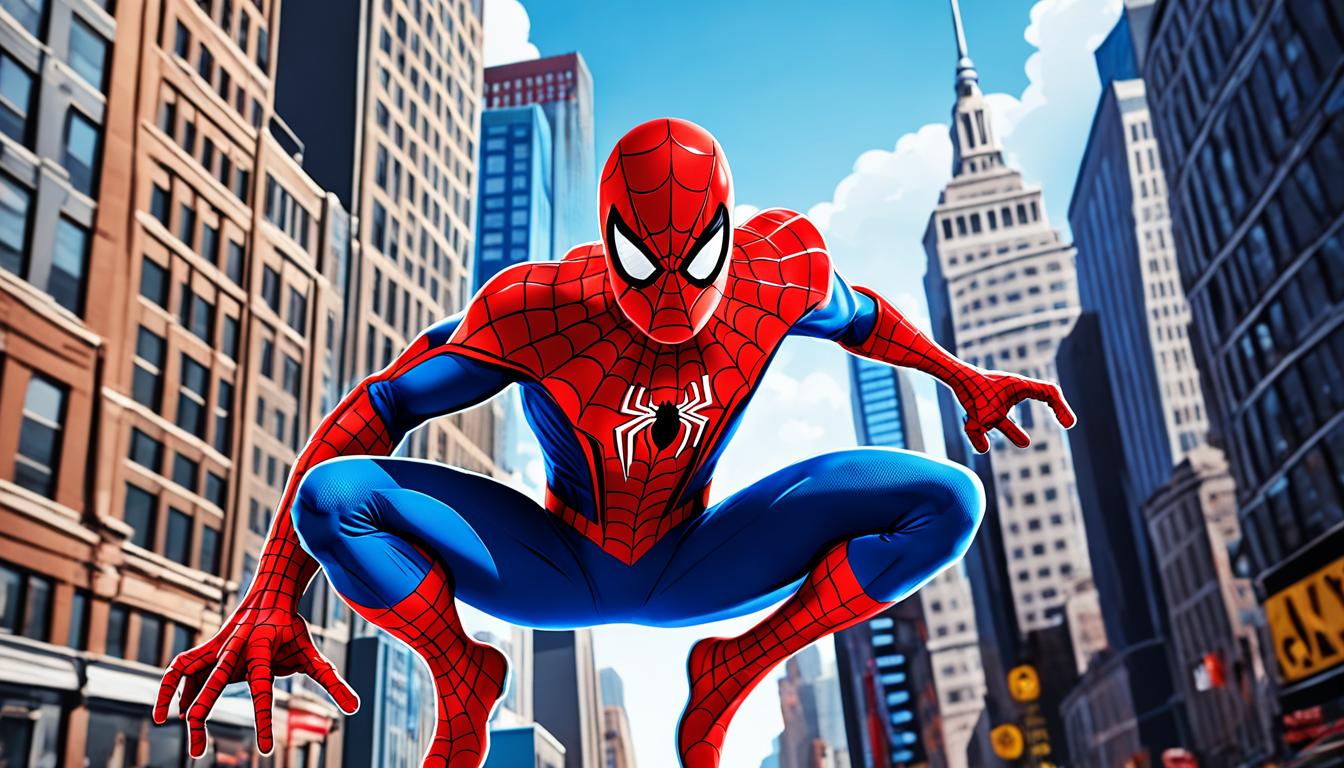
Coloring Spiderman’s Costume
Spiderman’s iconic costume is predominantly red and blue, and coloring it correctly is essential to bring the superhero to life. In this section, we will guide you through the process of adding color to your Spiderman drawing, providing you with a Spiderman coloring guide and painting tutorial. Let’s get started!
To color Spiderman’s costume, you can use markers or colored pencils, depending on your preference and the tools you have available. Begin by filling in the areas of the drawing with the base colors of red for the main body and blue for the webbed sections. Use bold and vibrant colors that closely resemble Spiderman’s classic costume.
Once you’ve laid down the base colors, it’s time to add shading and highlights to give the costume depth and dimension. Pay attention to the small details like the web lines and the emblem on Spiderman’s chest. Use darker shades of red and blue to create shadows in areas where lighting would naturally be less intense, such as under the arms or around the muscles.
Add lighter shades of red and blue to areas that would catch more light, such as the chest or the top of the head. This will create highlights and make the costume look more realistic. Experiment with blending and layering different shades to achieve the desired effect.
Remember to take your time and work gradually, building up the colors and tones to achieve a professional-looking result. Coloring Spiderman’s costume requires attention to detail and precision, as it is a crucial part of capturing the essence of the character.
With the vibrant colors and intricate web pattern, Spiderman’s costume is an essential element that sets him apart. By following this Spiderman coloring guide and painting tutorial, you’ll be able to bring the superhero to life on your own paper canvas. So grab your favorite coloring tools and unleash your creativity!
Now, let’s take a closer look at Spiderman’s costume and its color scheme:

| Color | Description |
|---|---|
| Red | The main color of Spiderman’s costume, representing his strength and determination. |
| Blue | The secondary color used for the webbed sections of the costume, adding a sense of dynamic movement. |
| Black | Used for outlining the web lines and adding depth to the costume. |
| White | Reserved for the eyes, adding contrast and bringing Spiderman’s expressive face to life. |
By utilizing these colors effectively, you’ll be able to create a visually striking Spiderman drawing that showcases the superhero in all his glory. Don’t be afraid to experiment with different shades and techniques to make your artwork unique and captivating.
Adding Shadows and Highlights
To make your Spiderman drawing more visually appealing and realistic, it’s essential to add shadows and highlights. By incorporating these elements, you can create depth and dimension in your artwork, bringing the character to life.
Start by using darker shades of blue or red to create shadows in areas that would naturally be darker. Focus on areas such as under the arms, around the muscles, or in the creases of the costume. The contrast between light and dark will enhance the three-dimensional feel of the drawing.
Conversely, add lighter shades to areas that would catch more light. For example, highlight the chest or the top of the head with lighter shades of blue or red. This technique will give the drawing a sense of illumination, making it more dynamic.
Remember to pay attention to the direction and intensity of the light source, as this will affect the placement and intensity of the shadows and highlights. Experiment with different shading techniques, such as cross-hatching or blending, to achieve the desired effect.
Here’s an example of the difference shadows and highlights can make:
Adding shadows and highlights is crucial to make your Spiderman drawing visually stunning. It brings depth and realism to the artwork, making it more appealing to the eye. Don’t be afraid to experiment with different shading techniques to achieve the desired effect.
Example:
| Without Shadows and Highlights | With Shadows and Highlights |
|---|---|
 |
 |
As you can see in the example above, adding shadows and highlights transforms a flat drawing into a more dynamic and lifelike representation of Spiderman. Take your artwork to the next level by mastering the art of shading and highlighting!
Fine-Tuning and Final Details
Once the basic structure and details of your Spiderman drawing are complete, it’s time to refine and fine-tune the artwork. This stage allows you to add those finishing touches and make any necessary adjustments to take your drawing to the next level.
Here are some important tips and techniques to consider during the fine-tuning process:
- Step back and evaluate your drawing as a whole. Look for any mistakes, inconsistencies, or areas that need improvement.
- Make any necessary corrections or adjustments to the proportions, ensuring that Spiderman’s body and features are well-balanced and accurate.
- Add additional details to enhance the overall appearance of the drawing. Consider adding texture to Spiderman’s costume or adding highlights to the web lines to create depth and dimension.
- Pay close attention to smaller details, such as the muscles, facial features, and webbing, to ensure they are well-defined and accurately represented.
By taking the time to fine-tune and add these final details, you can give your Spiderman drawing a polished and professional look.
Example:
“During the fine-tuning stage, I carefully examined my Spiderman drawing for any errors or inconsistencies. I made minor adjustments to the proportions and added additional details like texture to the costume and highlights to the web lines. These final touches not only enhanced the overall appearance of my artwork but also gave it a more dynamic and realistic feel.”
Remember, the ultimate goal of fine-tuning is to create a Spiderman illustration that accurately captures the essence and spirit of the character. So, take your time, pay attention to the details, and have fun bringing your artwork to life.

| Spiderman Art Tips | Spiderman Illustration Techniques |
|---|---|
| 1. Evaluate your drawing as a whole | 1. Take the time to fine-tune the drawing |
| 2. Make necessary corrections or adjustments to proportions | 2. Add additional details to enhance the artwork |
| 3. Pay attention to smaller details | 3. Focus on accurate representation of Spiderman’s features |
Showcasing Your Spiderman Artwork
Once you’ve completed your Spiderman drawing, it’s time to showcase your artwork and share it with others. Whether you prefer to display it online through social media or in-person with friends and family, there are various ways to exhibit your creative prowess. Here are a few suggestions:
1. Share on Social Media
Take advantage of platforms like Instagram, Facebook, or Twitter to showcase your Spiderman artwork. Post high-quality photos of your drawing and use relevant hashtags such as #SpidermanArt or #DrawingTutorial to reach other fans. You might even attract the attention of fellow artists and enthusiasts who can offer valuable feedback and support.
2. Participate in Art Communities
Join online art communities where you can share your Spiderman drawing and connect with other artists who share your passion. Platforms like DeviantArt or ArtStation allow you to create a portfolio, receive feedback, and engage in discussions with a like-minded community. Take part in art challenges or collaborations to further showcase your talent.

“Sharing your artwork with others is not only an opportunity to receive praise and recognition but also a chance to learn and grow as an artist. Embrace constructive criticism and use it as a stepping stone to improve your skills.” – Artist Name
3. Organize an Art Exhibition
If you prefer a more traditional approach, consider organizing an art exhibition to showcase your Spiderman artwork. Rent a gallery space or collaborate with local cafes, libraries, or community centers to display your drawings. Invite friends, family, and art enthusiasts to attend the event and appreciate your artistic endeavors.
4. Gift or Sell Your Artwork
Don’t hesitate to gift your Spiderman artwork to fellow fans as a token of appreciation or consider selling it to art collectors or enthusiasts. Websites like Etsy or Society6 provide a platform for artists to showcase and sell their work. This gives others the opportunity to enjoy your art and allows you to monetize your skills.
Remember, showcasing your Spiderman artwork is not just about displaying your talent, but also about connecting with other fans and artists who share your love for the character. So, be proud of your creation and use it as a stepping stone to further develop your drawing skills.
Conclusion
Drawing Spiderman is an exciting journey that allows you to unleash your artistic skills and bring this iconic superhero to life on paper. By following step-by-step tutorials and implementing art tips and techniques, you can create your own impressive Spiderman artwork. Whether you are a beginner, eager to learn the basics, or an experienced artist looking to refine your techniques, this comprehensive guide provides all the necessary tools.
Through careful observation and attention to detail, you’ll learn how to master Spiderman’s muscular physique, capture the essence of his mask, and replicate the vibrant colors of his costume. By adding shadows and highlights, you can bring depth and dimension to your artwork, making it truly stand out.
So, whether you’re sketching with pencils or adding colors with markers or colored pencils, grab your art supplies and get ready to embark on an unforgettable artistic adventure. With these valuable tips and tutorials at your disposal, you’ll be able to create captivating Spiderman artwork that will impress fellow fans and showcase your artistic talent. So don’t wait any longer – let your creativity soar and start drawing Spiderman today!


