How to Draw Eyes – Drawing Turorials and Coloring Tips
Drawing eyes is a fundamental skill for any artist, whether you’re a beginner or an experienced professional. But have you ever wondered how to capture the essence of a person or character through their eyes? How can you add depth, emotion, and realism to your eye drawings?
In this comprehensive guide, we will walk you through step-by-step tutorials and share invaluable tips to help you master the art of drawing eyes. From understanding the correct proportions and positioning of the eyes on the face to exploring different eye shapes and adding intricate details, you will learn everything you need to create captivating and lifelike eyes in your artwork.
But that’s not all—we’ll also delve into the world of color and shading, showing you how to bring your eye drawings to life with vibrant hues and realistic textures. Get ready to take your artistic skills to the next level and make your eye drawings truly mesmerizing.
So, are you ready to unlock the secrets of eye drawing and take your artwork to new heights?
Key Takeaways:
- Master the proportions and positioning of eyes on the face.
- Create depth and perspective by understanding eye shapes and angles.
- Convey emotions through expressive eye drawings.
- Explore different eye shapes and consider symmetry and age-related changes.
- Add realistic details and master coloring techniques.
Deciding Eye Position
In order to create realistic eye drawings, it is essential to determine the correct position of the eyes on the face. The position of the eyes greatly influences the overall expression and character of your artwork. To achieve accurate eye placement, it is important to consider factors such as face proportions and symmetry.
Face proportions play a significant role in creating lifelike drawings. By understanding the relationship between the different facial features, you can ensure that the position of the eyes is in harmony with the rest of the face. The eyes are typically positioned halfway between the top of the head and the chin, while the distance between the eyes is roughly equal to the width of one eye.
| Facial Proportions | Guidelines for Eye Position |
|---|---|
|
Another crucial aspect to consider is facial symmetry. The human face is generally symmetrical, meaning that the left and right sides are mirror images of each other. When drawing eyes, it is important to maintain this symmetry to create a balanced and natural appearance. Paying attention to the position and size of each eye will help achieve a realistic result.
“The eyes are the window to the soul.” – Unknown
By following these guidelines and taking into account face proportions and symmetry, you can accurately position the eyes in your drawings. This will lay a solid foundation for capturing realistic expressions and bringing your artwork to life.
Eyes from Different Angles
Drawing eyes from various angles can be a challenging task for artists. To achieve realistic and dynamic results, it is essential to understand the shape of the eye and its movement within a three-dimensional space. By mastering the art of depicting eyes from different angles, you can bring depth and perspective to your eye drawings.
To begin, let’s explore the importance of eye shape in capturing realistic angles. The shape of the eye can vary based on factors such as ethnicity, age, and facial features. Understanding these variations will allow you to accurately portray eyes from diverse perspectives.

Next, consider the three-dimensional space in which the eyes exist. Just like any other object, eyes have depth and occupy space. By understanding how the eye fits into this space, you can accurately depict the angle and placement of features such as the iris, pupil, and eyelids.
One effective technique for drawing eyes from different angles is to break the eye down into basic shapes. Start by sketching a simplified outline of the eye using geometric forms such as circles, ovals, and triangles. This will help you establish the overall structure and perspective.
Once the basic shapes are in place, you can refine the drawing by adding more details and features. Pay attention to how the eyelids wrap around the eye and how they change in appearance from different angles. Study the interaction between the eye and surrounding facial features, such as the brow bone and cheekbones, to capture accurate perspectives.
Remember to observe and reference real-life examples, photographs, or even use a mirror to study your own eyes from different angles. These references will provide valuable insights into how the eye’s shape and features change when viewed from various perspectives.
“Drawing eyes from different angles requires a deep understanding of the eye’s shape and its placement within the three-dimensional space. By combining observation and knowledge of anatomy, you can create realistic and dynamic eye drawings that capture the viewer’s attention.”
By practicing drawing eyes from different angles, you will gradually develop your skills and gain confidence in depicting realistic perspectives. Experiment with various angles, lighting conditions, and expressions to enhance your understanding of the eye’s form and movement within space.
Key Takeaways:
- Understanding the shape of the eye is crucial for accurately depicting eyes from different angles.
- Consider the eye’s placement within a three-dimensional space to achieve depth and perspective in your drawings.
- Breaking down the eye into basic shapes can help establish the overall structure and correct angle.
- Study real-life references, photographs, or use a mirror to observe eyes from different angles and perspectives.
- Practice regularly to improve your skills in capturing realistic eye drawings from various angles.
Now that we have explored the challenges and techniques of drawing eyes from different angles, let’s move on to the next section, where we will delve into the fascinating world of drawing eye expressions.
Drawing Expressions
The eyes have a remarkable ability to express a range of emotions, from joy and excitement to sadness and anger. To create eye drawings that truly capture these emotions, it’s essential to understand how to utilize the eyebrows and facial muscles effectively. By exaggerating certain features and manipulating the eyebrows and facial muscles, you can enhance the expressiveness of your drawings and make them more engaging.
When drawing expressive eyes, pay close attention to the eyebrows as they play a significant role in conveying emotions. Experiment with different eyebrow shapes and positions to reflect various moods. Arched eyebrows, for instance, can indicate surprise or skepticism, while raised eyebrows can convey excitement or curiosity.
The facial muscles surrounding the eyes are also crucial for portraying emotions accurately. For example, when someone is smiling, the muscles around the eyes subtly shift, creating crow’s feet or laugh lines. By incorporating these small details, you can add depth and realism to your eye drawings, making them more relatable to viewers.

William Shakespeare’s quote emphasizes the power of the eyes in revealing one’s true emotions. As an artist, it is your job to capture these emotions in your drawings. Take the time to study people’s faces, observe how their eyebrows move, and how their eye muscles affect the overall expression. With practice and keen observation, you can master the art of drawing expressive eyes that speak directly to the viewer’s emotions.
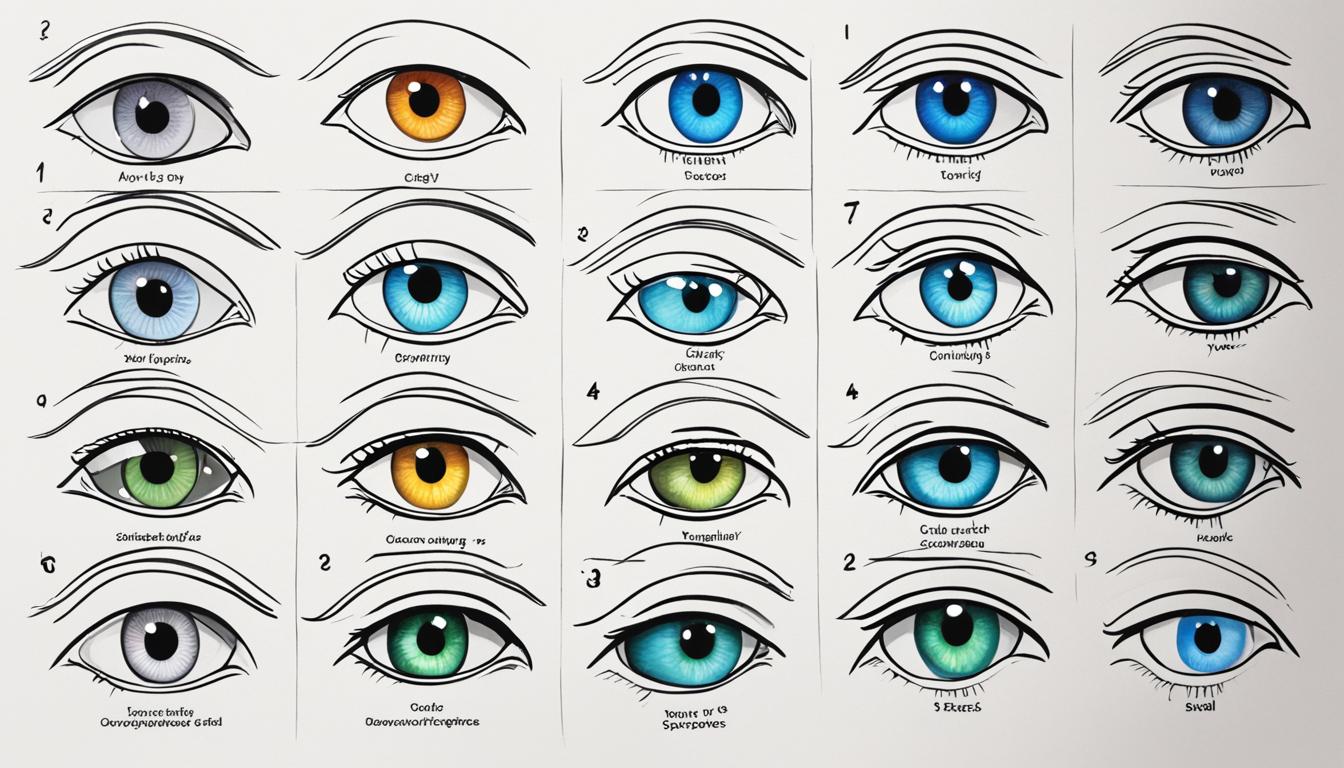
Eye Shapes
Eyes are unique and diverse, each with its own shape and character. Understanding the different eye shapes is crucial for artists looking to create realistic and engaging characters. In this section, we will explore various eye shapes and delve into considerations for symmetry and age-related changes in eye appearance.
When it comes to portraying emotions and personality through art, eye shapes play a crucial role. From almond-shaped eyes that convey a sense of mystery to round eyes that exude innocence, each shape adds a distinct touch to a character’s identity.
Eye Symmetry: Symmetry is an important aspect of eye shape. Balanced symmetry brings harmony to the face and lends a natural aesthetic appeal. However, it’s essential to remember that complete symmetry is rare in human beings, and slight variations in eye shape are often what make individuals unique.
Age-Related Changes: As we age, the appearance of our eyes undergoes subtle transformations. These changes include the development of fine lines and wrinkles, drooping eyelids, and a loss of elasticity. Artists aiming to depict realistic characters should consider these age-related alterations to enhance the authenticity of their artwork.
Let’s take a closer look at some common eye shapes:
1. Almond Eyes
“Almond-shaped eyes are often associated with sensuality and elegance. They have an elongated, tapered shape that creates a captivating and alluring effect. This eye shape is versatile and pairs well with various facial features.”
2. Round Eyes
“Round eyes are characterized by a circular shape and a wide, open appearance. They often symbolize innocence, youthfulness, and playfulness. Artists can emphasize round eyes to give characters a youthful and friendly look.”
3. Hooded Eyes
“Hooded eyes have a unique shape where the eyelid fold partially covers the upper eyelid. This eye shape adds a sense of mystery and depth to a character’s expression. Artists can play with shadows and highlights to accentuate the distinctive features of hooded eyes.”
4. Upturned Eyes
“Upturned eyes have an outer corner that slightly slopes upward. This shape gives a cheerful and optimistic vibe to characters. Artists can emphasize the upward angle to create a sense of enthusiasm and positivity.”
Exploring and experimenting with different eye shapes allows artists to infuse their characters with depth, personality, and realism. By paying attention to symmetrical variations and age-related changes, artists can create unique and relatable characters that resonate with audiences.

Details and How to Color Eyes
Adding details to the eyes is the key to bringing your drawings to life. It’s these small nuances that create a realistic and captivating effect. In this section, we’ll delve into the finer details of eye drawing, including shading the cornea, positioning the pupil, and different coloring techniques.
When it comes to shading the cornea, it’s important to understand the anatomy of the eye. The cornea is the transparent front part of the eye that covers the iris and pupil. To achieve a realistic look, use lighter shades to depict the highlights on the cornea, and gradually darken the shading towards the edges. This creates depth and adds dimension to the eye.
Positioning the pupil correctly is another crucial aspect of eye drawing. The pupil is the dark circular opening in the center of the iris. It’s essential to place it in the right spot to achieve a natural-looking eye. Consider the angle and direction in which the eyes are looking, and adjust the position accordingly.

When it comes to coloring the eyes, there are various techniques you can use to create different effects. Whether you’re drawing realistic eyes or going for a more stylized approach, understanding coloring techniques is important. Experiment with blending different shades and gradients to achieve the desired effect.
In conclusion, paying attention to eye details and mastering coloring techniques can elevate the quality of your eye drawings. Whether you’re aiming for realistic or stylized eyes, knowing how to shade the cornea, position the pupil, and apply various coloring techniques will help you create captivating and lifelike eyes.
Outlining the Eye
Creating a strong outline is the foundation for drawing realistic eyes. In this section, we will guide you through the process of outlining the basic shape of an eye, emphasizing the almond shape, defining the eyelids, and adding details such as lashes and creases.
Step 1: Almond-Shaped Outline
To begin, draw a horizontal line slightly curved in the middle to represent the upper eyelid. Then, draw a longer curved line below it to form the lower eyelid. These two lines should intersect at an angle to create the almond shape characteristic of the eye.

Step 2: Defining the Eyelids
Next, add depth and dimension to your eye by carefully drawing the upper and lower eyelids. The upper eyelid should appear thicker and curve slightly over the eyeball, while the lower eyelid will be thinner and follow the shape of the eyeball.
Step 3: Adding Eyelashes
Eyelashes are an essential element in bringing your eye drawing to life. Use short, curved strokes to create the illusion of individual lashes along the upper and lower eyelids. Vary the length and direction of the lashes to add realism and depth to your drawing.
Step 4: Adding Creases and Details
To enhance the realism of your eye drawing, don’t forget to add subtle creases and details around the eyelids. These soft lines and folds will give your drawing a more natural and three-dimensional appearance.
Tip: Observe and study real eyes, paying attention to how the eyelids, lashes, and creases interact. This will help you understand the intricacies of eye anatomy and improve your drawing skills.
Practice Exercise
Take a moment to practice outlining eyes using the techniques described above. Start with simple shapes and gradually add more complexity as you gain confidence. Remember to observe and use references to improve your understanding of eye structures.
| Eye Detail | Description |
|---|---|
| Almond Shape | The almond shape refers to the curved, tapered outline of the eye. |
| Eyelids | The upper and lower folds of skin that cover the eyeball. |
| Eyelashes | The hair-like structures that grow from the eyelids, framing the eye. |
| Creases | Soft lines and folds around the eyelids that add realism to the eye drawing. |
Shading and Adding Depth
Shading is a fundamental technique that adds depth and realism to your eye drawings. By incorporating highlights and shadows, you can create dimension and make your eyes come to life.
To begin shading, consider the light source in your drawing. This will determine where the highlights and shadows fall on the eyes. By understanding the direction and intensity of the light, you can accurately depict the shading.
Start by lightly sketching the basic shapes and contours of the eyes. Then, gradually build up the shading using different pressure and shading techniques. Pay attention to areas that naturally receive less light, such as the lower eyelid and the inner corner of the eye.
Blending is an important technique when it comes to shading. It helps create smooth transitions between light and dark areas, giving your drawing a realistic appearance. You can use blending tools like tortillons, blending stumps, or even your fingers to achieve a seamless blend.
Remember to observe real-life references or photographs to study the subtle variations in shading and depth. Notice how the highlights and shadows interact with each other, creating a sense of volume and form.
Adding Highlights and Shadows
Highlights are areas where the light directly hits the eye, creating a bright spot. These can be depicted using lighter tones or leaving parts of the paper untouched. Highlights add brilliance and catch the viewer’s attention, making your eyes appear vibrant and three-dimensional.
Shadows, on the other hand, are areas where the light is blocked or hidden, resulting in darker tones. Shadows help define the shape and contour of the eyes and give them depth. By carefully observing how light interacts with the eye, you can accurately place shadows to create a realistic effect.
Don’t be afraid to experiment with different shading techniques and tools to achieve the desired effect. Practice shading on a separate piece of paper to sharpen your skills before applying it to your actual drawing. With time and practice, you will develop a keen eye for shading and create stunningly realistic eyes.

| Shading Techniques | Tools |
|---|---|
| Hatching: Create shading using parallel lines that follow the contour of the eye. | Drawing pencils |
| Cross-hatching: Use intersecting lines to build up the shading gradually. | Blending stumps |
| Stippling: Apply numerous dots to create shading and texture. | Tortillons |
| Graduated shading: Gradually transition from light to dark tones. | Fingers (for blending) |
Adding Final Touches
When it comes to creating realistic eye drawings, the finishing touches can elevate your artwork to a whole new level. This section will guide you through the final steps of adding those crucial details that bring your drawings to life.
Enhancing Eyelashes
One of the key elements that adds depth and definition to the eyes is the eyelashes. To make your eyelashes look natural and realistic, start by sketching thin, curved lines along the upper and lower eyelids. These lines should gradually increase in length towards the outer corners of the eyes. Use a lighter touch to add subtle variations in thickness and direction, mimicking the appearance of individual lashes.

Create Stunning Reflections
To enhance the realism of your eye drawings, capturing the reflections is essential. Depending on the light source and the specific eye position, reflections can take different forms. Use a fine-tipped pencil to carefully add small, bright highlights on the surface of the eyes, indicating the interaction with light. Pay attention to the reflections on the cornea and experiment with various shapes and intensities to achieve realistic effects.
Bringing It All Together
To achieve a realistic look, consider the interplay of light and shadow on the eyes. Use hatching or cross-hatching techniques to add subtle shading and depth, giving the eyes a three-dimensional appearance. Focus on areas such as the creases of the eyelids, the inner corners, and the lower lash line. Remember to observe and study reference images to accurately render the unique features of the eyes you are drawing.
With the addition of these final touches—meticulously drawn eyelashes, stunning reflections, and strategic shading—your eye drawings will exude a level of realism that captivates viewers. Take your time, practice, and most importantly, enjoy the process of bringing your eye drawings to completion.
Conclusion
By following the techniques, tips, and step-by-step tutorials in this article, you have taken a significant stride in improving your eye drawing skills. Drawing eyes is a foundational skill in the art world, and with practice, you can continue to refine your abilities and create captivating eye drawings.
Remember, the key to improving your artistic skills is consistent practice. Dedicate time each day to sketching and experimenting with different styles and approaches. As you continue to draw eyes, you will gain a better understanding of their structure, proportions, and expressions.
Additionally, don’t be afraid to explore different mediums, such as colored pencils or digital art tools, to enhance your eye drawings. Each medium offers unique opportunities for creativity and experimentation.
As you continue on your artistic journey, keep in mind that drawing eyes is just the beginning. Use the newfound knowledge and techniques you have acquired to expand your artistic repertoire and explore other aspects of character design. With dedication and perseverance, you will continue to grow as an artist and create eye-catching artwork.


