How to Draw Birds – Drawing Turorials and Coloring Tips
Have you ever wondered how to capture the beauty of birds on paper? Drawing birds can be a mesmerizing and rewarding experience, allowing you to delve into the intricate details of their feathers, colors, and movements. But where do you start? How can you bring these magnificent creatures to life through art?
In this article, we will guide you through the process of drawing birds, sharing invaluable tips, techniques, and tutorials that will help you master the art of bird drawing. Whether you’re a beginner or an experienced artist, these insights will empower you to create realistic and captivating bird illustrations.
From understanding bird anatomy and utilizing the compass method to observing birds in their natural habitat and choosing the perfect colors, we will cover every aspect of bird drawing. So, get ready to embark on a creative journey that will enable you to transform a blank canvas into a stunning representation of these majestic creatures.
Key Takeaways:
- Understanding bird anatomy is essential for drawing realistic birds.
- The compass method can be a helpful technique for establishing proportions and feature placements.
- Observing birds in their natural habitat and studying photographs are valuable references for capturing their essence.
- Practice makes perfect – continuous practice and experimentation are key to improving your bird drawing skills.
- Choosing the right colors and adding depth to your artwork can bring your bird illustrations to life.
Understanding Bird Anatomy for Accurate Drawings
Bird anatomy is crucial for creating realistic and accurate bird drawings. By understanding the structure and features of birds, you can bring your artwork to life. Here are some key aspects of bird anatomy to keep in mind:
Proportions and Posture
To capture the essence of a bird, start by establishing its proportions and posture. Use basic shapes as a foundation, such as an oval for the body and a circle for the head. These shapes will serve as a guide for getting the overall structure right.
Feather Groups
Birds have different groups of feathers that define their shape and contours. These feathers grow from specific regions on the bird’s body. By understanding the arrangement and movement of feathers, you can accurately represent the texture and form of a bird’s plumage.
Close-up Study
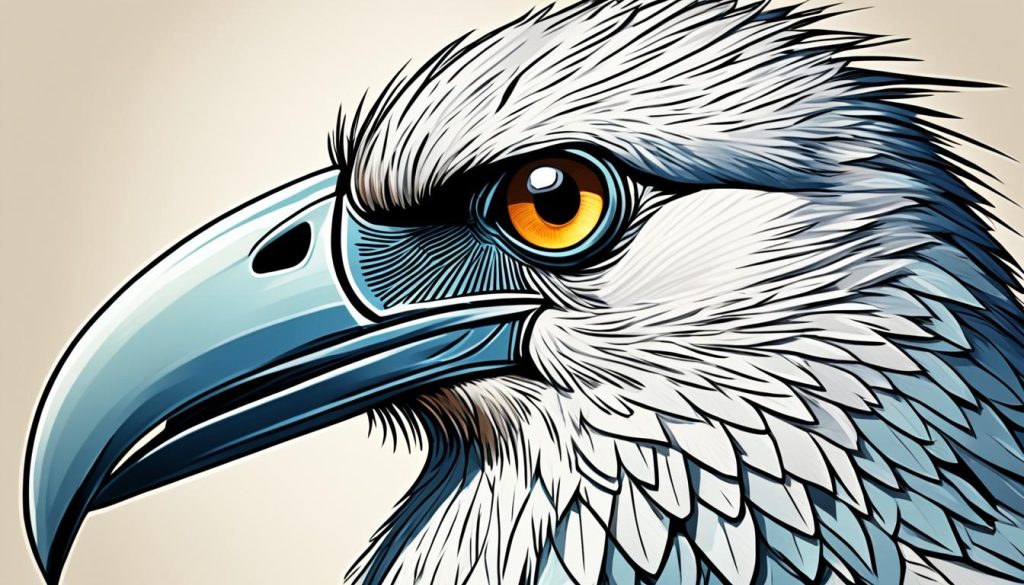
Studying close-up photos of birds is essential for understanding intricate details. Zoom in on feathers, beaks, eyes, and other features to observe the smaller elements that make each bird unique. Pay attention to how feathers overlap and interact with each other.
Color Patterns
The arrangement of feathers determines the color patterns of birds. Observe how colors transition, blend, or contrast on different parts of the bird’s body. Understanding these patterns will help you recreate realistic and visually appealing drawings.
| Feather Group | Location |
|---|---|
| Contour feathers | Cover the body, wings, and tail |
| Down feathers | Provide insulation and softness |
| Flight feathers | Found on the wings and tail |
| Semiplume feathers | Support contour feathers and provide insulation |
| Filoplume feathers | Located near the base of contour feathers |
| Bristle feathers | Found around the eyes, beak, and other sensitive areas |
“Understanding the basic arrangement and movement of feathers is the key to capturing the essence of birds in your drawings.” – Unknown
By focusing on bird anatomy, you’ll be able to create accurate and realistic drawings that showcase the beauty and intricacies of these fascinating creatures.
Using the Compass Method for Bird Drawing
The compass method is a valuable technique for artists looking to create accurate and proportional bird drawings. By imagining a compass with north, east, south, and west points, you can establish feature placements and develop a solid foundation for your artwork.
Utilizing the compass method, begin by drawing the fundamental shapes of a bird, such as the circular head and triangular wings. These basic shapes will help you establish correct proportions and capture the essence of the bird’s form.
Once you have drawn the shape of the bird using the compass method, you can use the established guidelines to accurately place and draw the bird’s features. Pay close attention to the placement of the eyes, beak, and legs, ensuring that they align with the compass points. This technique will help maintain correct proportions and bring accuracy to your bird drawing.
Experiment with different perspectives and orientations while using the compass method. This will give your bird drawings depth and variety, allowing you to explore different angles and poses.
To enhance your bird drawing further, consider incorporating sketching, linework, shading, and color. These techniques will bring life and dimension to your artwork, making the bird appear more realistic and captivating.

Tips for Using the Compass Method:
- Start by drawing basic shapes, using the compass method as a guide.
- Pay attention to the placement of features in relation to the compass points.
- Experiment with different perspectives and orientations for more dynamic drawings.
- Enhance your bird drawings with sketching, linework, shading, and color.
Using the compass method in your bird drawings can be an effective way to achieve accuracy and proportionality. Practice this technique and explore different bird species to expand your artistic skills and create stunning bird drawings.
Tips for Drawing Feathers and Wings
Feathers play a significant role in capturing the essence of a bird’s appearance. When drawing feathers, it’s important to focus on creating smoothly curved lines without sharp angles or breaks. These lines represent the softness and flow of feathers, giving your drawing a realistic touch.
Most of the feathers on a bird’s body streamline its shape, contributing to its overall beauty and functionality. Understanding the function and arrangement of feathers is crucial to accurately portraying a bird in your artwork.
Feathers on the front of the head are delicate and tiny, while feathers on the body are longer and more flexible. These differences in feather structure add depth and texture to your drawings, enhancing the overall realism.
When it comes to wing and tail feathers, they are long, straight, and stiff. Paying attention to their shape and placement is essential for capturing the graceful flow and movement of a bird in flight.
Take a close look at the patterns of wing feathers and study their arrangement. Whether it’s the subtle color variations or the intricate patterns, these details contribute to the unique beauty of each bird species. Incorporating such feathery details into your drawings will elevate your artwork to the next level.
Capturing Feathery Details: Tips and Techniques
- Start with basic shapes: Begin your drawing by establishing the basic shapes of the feathers, keeping in mind their size, length, and arrangement.
- Observation is key: Study photographs, bird specimens, or even real birds to observe and understand the different types of feathers and how they interact with each other.
- Add texture and shading: Use light strokes and varying pressure to create depth and texture in your feathered areas. Gradually build up layers of color and shade to mimic the delicate appearance of feathers.
- Focus on contour and movement: Emphasize the contours and movement of feathers by following their natural flow. Pay attention to the direction in which the feathers point and how they curve along the bird’s body.
- Experiment with different materials: Try using different drawing tools and materials such as pencils, pens, or brushes to recreate the diverse textures and effects of feathers.
- Practice capturing detail: Take the time to study and practice drawing various types of feathers, from the small and intricate ones on a bird’s head to the larger and more structured feathers found on wings and tails.
By focusing on these tips and techniques, you’ll be able to master the art of drawing feathers and wings, capturing their feathery details with precision and skill.
| Feathers | Description |
|---|---|
| Head feathers | Tiny and delicate feathers found on the front of a bird’s head. |
| Body feathers | Longer and more flexible feathers that streamline the bird’s overall shape. |
| Wing feathers | Long, straight, and stiff feathers that enable flight. |
| Tail feathers | Feathers at the end of the bird’s tail, contributing to its balance and steering during flight. |
Remember, capturing the intricate details of feathers and wings requires practice and careful observation. Enjoy the process of bringing these elements to life in your drawings, and watch as your feathered subjects come alive on the page.

Observing and Sketching Birds in Life
Observing birds in their natural habitat is a vital part of capturing their essence in drawings. By spending time watching birds in their element, you can gain a deeper understanding of their behavior and movement, which will help you create more lifelike sketches. However, drawing birds in real-time can be a challenge as they are known for their quick movements. Here are some tips to help you make the most of your bird sketching sessions:
- Pay attention to bird postures and angles: Observe how birds hold their wings, the patterns of markings on their bodies, and the unique shapes of their bills. These distinctive features will add personality and accuracy to your sketches.
- Practice sketching birds in different postures: Birds can be found in various positions while perched, flying, or feeding. By practicing drawing birds in different postures, you’ll develop a better understanding of their anatomy and movement.
- Sharpen your observation skills: Take the time to carefully study the details of bird species you encounter. Notice the nuances of their feathers, the patterns of their markings, and the way they interact with their surroundings. These observations will enhance your ability to recreate these characteristics in your drawings.
Remember, drawing from life allows you to capture the unique essence and details of each bird species. It also helps you develop your observation skills, enabling you to create more authentic and captivating bird sketches.

Utilizing Photographs for Reference
Photographs can be an invaluable resource for bird drawing enthusiasts. They provide a wealth of visual information and allow for detailed studies of bird anatomy and plumage. Close-up bird photographs, in particular, offer the opportunity to examine intricate details that may be difficult to observe in real life.
When using bird photographs as drawing references, take the time to carefully study the shapes, patterns, and colors captured in the image. Pay attention to the unique characteristics of each bird species, such as the arrangement of feathers, the shape of the beak, and the posture of the bird. This attention to detail will contribute to creating accurate and realistic bird drawings.
One technique to enhance your understanding of bird anatomy is to replicate the intricacies of a photograph in your own drawings. Start by sketching the same image multiple times, focusing on capturing the details and proportions as accurately as possible. This exercise will help reinforce your knowledge and skill in depicting specific bird features.
While photographs are valuable references, it’s important to remember that observing and drawing live birds provides a deeper understanding of their movements and behavior. Combine the use of photographs with firsthand observations to create well-rounded and insightful bird drawings.

You can see the attention to detail in the bird photographs, which provides a rich source of information for your drawing references.
| Benefits of Using Bird Photographs as Drawing References: |
|---|
| 1. Detailed Study: Bird photographs allow for close examination of intricate details that may be difficult to observe in real life. |
| 2. Accuracy and Realism: Replicating the details of a photograph in your drawings can contribute to creating accurate and realistic bird illustrations. |
| 3. Proportions and Posture: Bird photographs provide valuable references for capturing the correct proportions and posture of different bird species. |
| 4. Enhancing Bird Anatomy: Deepen your understanding of bird anatomy by studying the specific features and arrangements seen in photographs. |
| 5. Complementing Live Observations: Combine the use of photographs with firsthand observations of live birds to gain a comprehensive understanding of their movements and behavior. |
Learning by Doing – Practice Makes Perfect
Drawing birds is a skill that requires practice and patience. While not every attempt will result in a perfect drawing, each one offers valuable insights and the opportunity for continuous improvement. The key is to measure your success not by the final outcome, but by the knowledge and understanding gained through the drawing process.
Each drawing you create serves as a reflection of your current abilities and highlights areas that can be further developed. Embrace the imperfections and view them as stepping stones on your artistic journey. With consistent practice, you can fill the gaps in your knowledge and refine your drawing skills.
Remember to enjoy the process of learning. Drawing birds opens up a whole new world of observation and appreciation for the beauty of nature. Allow yourself to explore different techniques, experiment with various materials, and find joy in every stroke of the pencil or brush.
By immersing yourself in the practice of drawing birds, you not only enhance your artistic abilities but also deepen your connection with the avian world. So, grab your sketchbook, observe the intricate details of feathers, and embark on an exciting journey of continuous learning and improvement.

“Continuous learning is the key to continuous improvement. The more you practice, the better you become.”
Step-by-Step Drawing Tutorials by David Sibley
David Sibley, a renowned bird illustrator, has created a series of step-by-step drawing tutorials that are perfect for aspiring bird artists. These tutorials are designed to help you master the art of drawing North American bird species. By following along with David Sibley, you’ll learn valuable techniques and gain insights into the unique characteristics of different bird species.

Each tutorial takes you through the process of drawing a specific North American bird, providing detailed instructions and tips along the way. Whether you’re a beginner or an experienced artist looking to refine your bird drawing skills, these tutorials offer a wealth of knowledge and inspiration.
Once you’ve completed a tutorial, share your finished drawings on Instagram using the hashtag #SketchWithSibley and tag @audubonsociety. This allows you to connect with other bird artists and showcase your work to a wider audience.
Example Tutorial: Northern Cardinal
In one of the tutorials, David Sibley guides you through the process of drawing a Northern Cardinal, one of the most iconic bird species in North America. The tutorial begins by breaking down the cardinal’s anatomy and identifying key features. Then, step-by-step, you’ll learn how to sketch its body, add details like feathers and coloring, and bring the bird to life on paper.
“Drawing a Northern Cardinal is a great way to practice shading and capturing the vibrant colors of birds. By following my step-by-step instructions, you’ll be able to create a realistic representation of this beautiful species.”
Whether you’re interested in songbirds, waterfowl, or birds of prey, David Sibley’s drawing tutorials cover a wide range of species, allowing you to expand your repertoire and explore different artistic styles. From simple sketches to intricate illustrations, these tutorials offer something for every skill level.
With David Sibley as your virtual guide, you’ll gain confidence in your drawing abilities and develop a deeper appreciation for the unique beauty of North American bird species.
| Tutorial | North American Bird Species |
|---|---|
| Tutorial 1 | American Robin |
| Tutorial 2 | Mallard Duck |
| Tutorial 3 | Bald Eagle |
Tips for Choosing Colors and Adding Depth to Bird Art
Creating vibrant and realistic bird artwork involves careful consideration of colors and techniques. Here are some tips to help you choose the right colors and add depth to your bird art:
- Consider the color palette of the bird species you are drawing. Study reference photos or observe birds in their natural habitats to understand their unique coloration.
- Pay attention to how light and shadows affect the appearance of feathers. Lighting can greatly influence the color and texture of a bird’s plumage.
- Experiment with various shading techniques to add depth and dimension to your drawings. Cross-hatching, stippling, and blending are effective methods for creating realistic shadows and highlights.
- Try using different materials to bring your bird art to life. Colored pencils offer precise control and can be layered to create rich, textured effects. Watercolors provide a fluid and transparent look, perfect for capturing the delicate nature of feathers.
- Don’t be afraid to play with colors. While it’s important to capture the realism of a bird’s appearance, adding your own artistic flair can make your artwork unique and eye-catching.
Remember, bird art is an expression of your creativity, so have fun and explore different color combinations and techniques.
| Choosing Colors and Adding Depth | Benefits |
|---|---|
| Consider the color palette | Allows for accurate representation of bird species |
| Study light and shadows | Enhances realism and adds dimension to drawings |
| Utilize shading techniques | Creates depth and realistic shadows and highlights |
| Experiment with different materials | Provides versatility and unique effects in bird artwork |
| Play with colors and techniques | Infuses individuality and creativity into your artwork |

Conclusion
Drawing birds is a rewarding and enjoyable artistic pursuit. By understanding bird anatomy, utilizing techniques like the compass method, and observing birds in life, you can create realistic and captivating bird drawings. Continuous practice and learning from your drawings will help you improve your skills over time.
Utilizing photographs as references allows you to study intricate details and shapes at your own pace. Incorporate your own style and creative choices to make your bird drawings unique. Remember to have fun throughout the process and appreciate the beauty of birds as you explore the world of bird drawing.
So, grab your sketchbook and start observing those fascinating feathered creatures. With dedication, practice, and the tips shared in this article, you’ll be well on your way to creating stunning bird drawings that showcase your passion for art and nature.


