How to Draw a Turkey Easy – Drawing Turorials and Coloring Tips
Have you ever wanted to draw a turkey but thought it was too challenging? Or maybe you’re looking for simple drawing tutorials and coloring tips to enhance your artistic skills? Look no further! In this article, we will guide you through easy step-by-step instructions to draw a turkey and provide helpful tips to make your artwork truly stand out. Whether you’re a beginner or an experienced artist, get ready to unleash your creativity and create a magnificent turkey masterpiece!
Key Takeaways:
- Learn how to draw a turkey easily with our step-by-step instructions.
- Discover helpful tips for coloring your turkey artwork for a captivating result.
- Explore a fun and cartoonish style for drawing turkeys, perfect for beginners.
- Take your turkey drawing to the next level with watercolor painting techniques.
- Access printable turkey coloring pages and other creative resources.
Materials Needed for Drawing a Turkey
When it comes to drawing a turkey, having the right materials is essential. Here are the supplies you’ll need to bring your turkey artwork to life:
- Drawing Paper: A smooth and sturdy surface to work on, ensuring your lines and colors come out crisp and clear.
- Pencils: Choose a range of graphite pencils, such as 2H, HB, and 2B, to achieve different shades and textures in your turkey drawing.
- Black Marker: A fine-tipped black marker will help you add bold outlines and define the features of your turkey with precision.
- Crayons: Bringing color to your drawing is where crayons come in handy. Select a variety of warm and vibrant colors to make your turkey truly stand out.
These drawing materials and turkey drawing supplies can be easily found and purchased on Amazon, making it convenient for you to get started on your turkey drawing project. Now let’s dive into the step-by-step guide for drawing a turkey in the next section.
Please note that the provided image is for visual representation purposes only and may not reflect the exact product recommendations mentioned above.
Step-by-Step Guide to Drawing a Turkey
Follow these simple steps to draw a turkey:
- Draw an oval for the body.
- Add a half circle for the tail.
- Draw a curved head and neck.
- Add the facial details.
- Draw the feet below the body.
- Add radial lines on the tail.
- Draw lines on the feathers.
- Add texture feather lines to the body.
- Trace the drawing with a marker and color.
Turkey Drawing Instructions
To begin drawing a turkey, start by sketching an oval shape for the body. This will serve as the foundation of your turkey drawing.
Next, add a half circle at the back of the oval to represent the turkey’s tail. Make sure the curve of the half circle aligns with the shape of the oval.
Now, draw a curved line above the body for the turkey’s head and neck. The curve should connect smoothly with the oval shape.
Once the head and neck are in place, it’s time to add the facial details. Draw a small curved line for the beak at the front of the head, and add an eye shape on either side of the beak.
Proceed to draw the turkey’s feet below the body by adding a pair of curved lines on each side.
Now, let’s focus on the tail. Add radial lines that extend outward from the center of the half circle you drew earlier. These lines will form the structure of the turkey’s feathers.
For extra detail, draw lines on the feathers to create a feather-like texture. Make sure the lines follow the contours of the feathers.
Lastly, trace the turkey drawing with a marker to darken the lines. You can then use crayons or colored pencils to bring your turkey to life with vibrant colors.
With these step-by-step instructions, you’ll be able to draw a turkey with ease. Practice and experiment with different colors and techniques to create unique and personalized turkey drawings.

Now that you’ve learned how to draw a turkey, it’s time to unleash your creativity and add your own personal touch!
Cartoon Turkey Tutorial
Looking to add a fun and playful touch to your turkey drawing? Our cartoon turkey tutorial is perfect for beginners and anyone wanting to create an easy turkey cartoon. By simplifying the shapes and emphasizing exaggerated features, you can bring your turkey to life with a whimsical charm.
Follow these step-by-step instructions to create your own cartoon turkey:
- Start with a large oval for the body. This will be the main shape of your turkey.
- Next, draw a smaller oval above the body for the head. Add two large circles for the eyes.
- Give your turkey a beak by drawing a triangle shape below the eyes. Add a small curve for the smile.
- Time to add the feathers! Draw a row of curved lines above the body, resembling a fan shape.
- Complete the feather details by adding smaller lines inside each feather. This will give your turkey a textured look.
- Draw two short, curved lines at the bottom of the body to represent the legs. Add a small oval at the end of each leg for the feet.
- Bring your cartoon turkey to life by coloring it with vibrant shades. Feel free to get creative and add patterns or additional details!
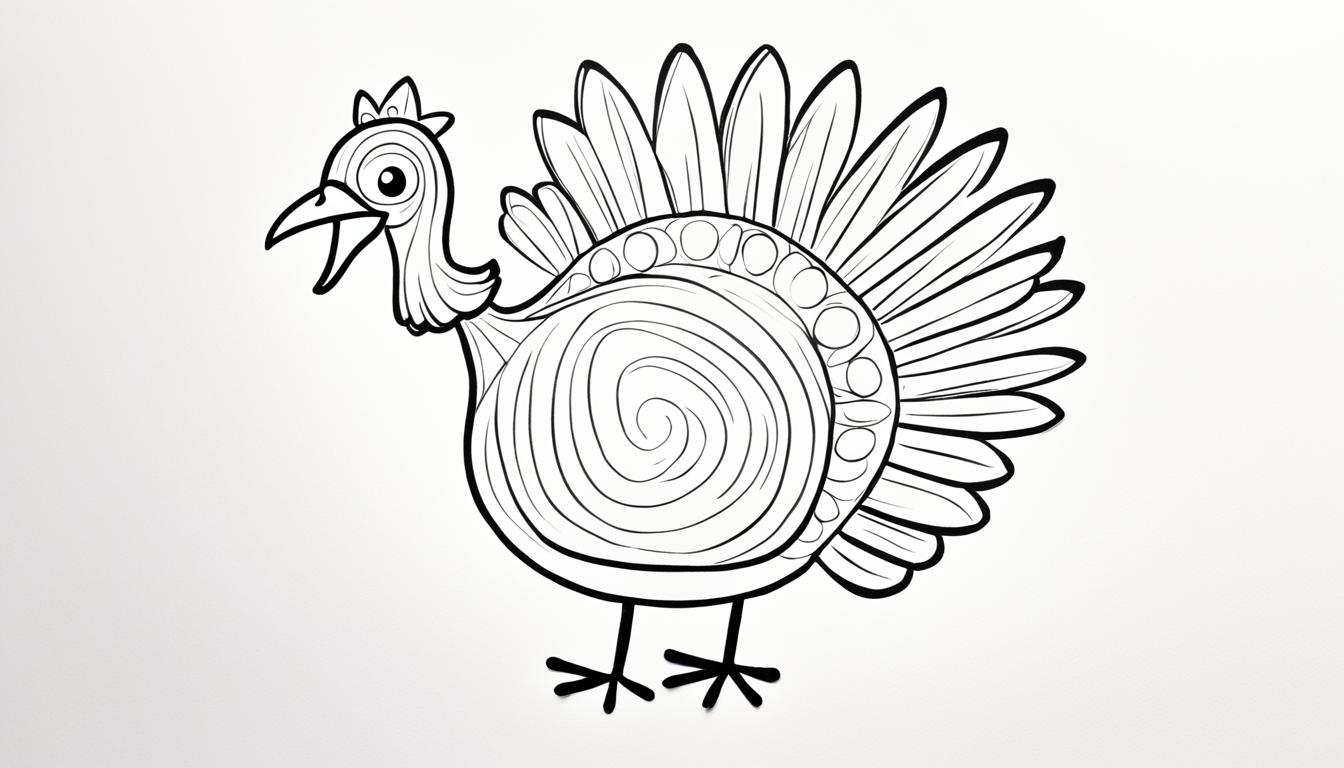
Get inspired by this adorable cartoon turkey drawing:

How to Color Your Cartoon Turkey
Choosing the right colors can make your cartoon turkey even more delightful. Here are some color suggestions:
| Feathers | Beak | Legs & Feet | Eyes | Background |
|---|---|---|---|---|
| Various shades of brown and yellow | Orange | Brown | Black | Green or autumnal colors |
Gather your coloring supplies and let your creativity soar!
Watercolor Turkey Painting
If you want to take your turkey drawing to the next level, try painting it with watercolors. Watercolor painting adds depth and vibrancy to your artwork, creating a stunning visual effect. In this section, we will provide you with tips and techniques for creating a beautiful watercolor turkey painting.
Watercolor painting is a versatile medium that allows you to blend colors and create soft, translucent layers. It is perfect for capturing the delicate details and textures of a turkey’s feathers, giving your artwork a realistic and lifelike appearance.
Before you begin, gather the necessary supplies for your watercolor turkey painting:
- Watercolor paints
- Watercolor brushes
- Watercolor paper
- Palette for mixing colors
- Masking tape
- Water container
- Paper towels or cloth
Once you have your supplies ready, follow these steps to create a stunning watercolor turkey painting:
- Step 1: Prepare your workspace
- Step 2: Sketch the outline
- Step 3: Begin with light washes
- Step 4: Build up layers
- Step 5: Add highlights and shadows
- Step 6: Refine the details
- Step 7: Let it dry
- Step 8: Frame or display your artwork
Find a clean and well-lit area to set up your painting station. Use masking tape to secure your watercolor paper to a flat surface, ensuring it doesn’t warp during the painting process. Have your brushes, paints, and water container within reach.
Start by lightly sketching the outline of the turkey using a pencil. Focus on capturing the basic shape and proportions. Don’t worry about adding too many details at this stage.
Start by applying light washes of watercolor to the different areas of the turkey. Use a larger brush and dilute the paint with water to create translucent layers. This will establish the base colors and values of your painting.
Once the initial washes have dried, gradually build up layers of color and detail. Use smaller brushes for more intricate areas, such as the feathers. Experiment with different techniques, such as wet-on-wet and wet-on-dry, to create texture and depth.
To make your turkey painting more realistic, add highlights and shadows to create volume and dimension. Use lighter colors or add water to create highlights, and darker, more concentrated colors for shadows.
After you have established the basic colors and values, focus on adding finer details, such as the turkey’s facial features and the intricate patterns of the feathers. Use a smaller brush and take your time to ensure accuracy.
Once you are satisfied with your watercolor turkey painting, allow it to dry completely. Avoid smudging or touching the painting during this time.
Once your painting is dry, you can choose to frame it and display it proudly or give it as a thoughtful gift to a loved one.
Remember, watercolor painting is a practice of patience and experimentation. Don’t be afraid to try different techniques and discover your unique style. With practice, you will be able to create stunning watercolor turkey paintings that capture the beauty and charm of these majestic birds.

Immerse yourself in the world of color and creativity with watercolor turkey painting. The delicate washes and vibrant pigments will bring your artwork to life with a touch of elegance. Explore different techniques, experiment with various color palettes, and watch as your turkey takes shape on the canvas.
| Supplies | Description |
|---|---|
| Watercolor paints | A wide range of colors for creating vibrant and translucent effects. |
| Watercolor brushes | A variety of brush sizes and shapes for different brushstrokes. |
| Watercolor paper | A high-quality, heavy-weight paper that can handle watercolor techniques. |
| Palette for mixing colors | A flat surface or palette with wells for blending and mixing colors. |
| Masking tape | Used to secure the watercolor paper to a flat surface. |
| Water container | For rinsing brushes and diluting the watercolor paint. |
| Paper towels or cloth | To absorb excess water and clean brushes. |
Turn Your Turkey Drawing into a Watercolor Painting
Ready to take your turkey drawing to the next level? Transform your artwork into a stunning watercolor painting with these easy steps. This section will guide you through the process and recommend the necessary painting supplies.
Step 1: Gather Your Painting Supplies
Before you begin, make sure you have the following painting supplies:
- Watercolor paper
- Watercolor paints
- Paintbrushes
- Water container
- Pencil or fine-tip pen
Step 2: Prepare Your Drawing
Start by creating a detailed pencil or fine-tip pen drawing of your turkey on the watercolor paper. Make sure the lines are light and easily erasable or won’t bleed through the paint.
Pro Tip: If you’re worried about the drawing lines smudging, use a kneaded eraser or a fixative spray before painting.
Step 3: Begin Painting
Now it’s time to dive into the magical world of watercolors! Start by wetting your paintbrush and applying water to the first area you want to paint. Then, dip your brush into the desired color and apply it to the wet area. Watch how the watercolor paint spreads and blends beautifully on the paper.
Step 4: Build Layers
Watercolors are all about layering. Allow each layer to dry completely before adding another layer of paint. This will create depth and dimension in your artwork.
Step 5: Add Details
Once the base layers are dry, use a smaller brush to add finer details to your turkey painting. Add shading, highlights, and any additional elements that will bring your artwork to life.
Pro Tip: Use a lighter touch when adding details to prevent the paint from bleeding or smudging.
Step 6: Let It Dry and Display
Allow your watercolor turkey painting to dry completely. Once dry, remove any pencil lines that are still visible. Frame your artwork, display it on your wall, or gift it to a friend or family member.
Now you’ve successfully turned your turkey drawing into a stunning watercolor painting. Enjoy the vibrant colors and delicate washes that watercolor brings to your artwork.

Get ready to impress with your newfound watercolor skills and create beautiful turkey paintings that will stand out.
Additional Turkey Coloring Pages
In addition to the drawing tutorials, this article also includes printable turkey coloring pages. These pages can be downloaded and printed for coloring fun.

Coloring is a great way to enhance creativity and relax. Whether you’re a child or an adult, these turkey coloring pages offer a fun activity that can be enjoyed by all. From intricate designs to simpler patterns, you’ll find a variety of options to choose from.
Turkey Coloring Pages Collection:
 |
 |
 |
 |
 |
 |
These printable coloring sheets feature various turkey designs and themes, allowing you to explore different color combinations and unleash your artistic flair. Simply click on the links below the images to download and print these coloring pages.
Whether you prefer traditional colors or want to experiment with vibrant palettes, these turkey coloring pages will provide hours of entertainment. Get your coloring tools ready and let your creativity soar!
Fall-Themed Turkey Drawing
Embrace the beauty of autumn with a fall-themed turkey drawing. Capture the vibrant colors and cozy atmosphere of the season as you create a unique turkey illustration that reflects the spirit of autumn.
When incorporating autumn elements into your turkey artwork, consider using warm hues like oranges, yellows, and browns to represent the changing leaves. Add details such as fallen acorns, pumpkins, or even a scenic background with trees in rich fall foliage.

By infusing your turkey drawing with seasonal elements, you can create a captivating piece of art that celebrates both the beauty of the turkey and the charm of autumn.
Membership Benefits and Access to Exclusive Resources
By becoming a member, you unlock a treasure trove of perks and exclusive resources that can take your artistic journey to new heights. Gain access to a wide range of crafty printables, including the highly sought-after Turkey Drawing Guide and other educational resources. Here are some of the remarkable benefits you can enjoy:
- Unlimited Downloads: Download as many craft printables as you like without any limitations or restrictions.
- Premium Content: Access exclusive materials, tutorials, and templates designed to elevate your creativity.
- Member-only Discounts: Enjoy special discounts on art supplies, tools, and workshops.
- Community Support: Connect with fellow artists, share your work, and receive valuable feedback and encouragement.
Becoming a member not only provides you with a wealth of resources but also gives you the opportunity to be part of a vibrant community of artists who share the same passion for crafting and creativity. Expand your artistic horizons, learn new techniques, and find inspiration in the collective wisdom of fellow members.
Join our membership today and unlock a world of artistic possibilities!

Membership Levels and Pricing
We offer different membership levels to cater to your specific needs and budget. Choose the level that best suits you and start enjoying the following benefits:
| Membership Level | Price | Perks |
|---|---|---|
| Basic | $9.99/month |
|
| Pro | $19.99/month |
|
| Ultimate | $29.99/month |
|
No matter which membership level you choose, you’ll be taking your artistic journey to the next level with exclusive resources and support. Don’t miss out on this opportunity to enhance your craft and connect with a thriving community of creators.
Conclusion
In conclusion, this article provides a comprehensive guide on how to draw a turkey easily. Whether you prefer traditional drawing techniques, cartoon styles, or watercolor paintings, there are step-by-step instructions and tips to suit your preferences. The addition of coloring pages and the opportunity to become a member for access to exclusive resources make this article a valuable resource for beginners and experienced artists alike.