How to Draw a Sword – Drawing Turorials and Coloring Tips
Are you ready to unleash your inner artist and learn how to draw a sword? Whether you’re a complete beginner or an experienced artist, this step-by-step guide will take you through the process of creating a stunning sword drawing. From sketching the handle to adding the final touches, we’ll provide you with helpful tips and techniques to bring your artwork to life.
But before we dive into the details, have you ever wondered how artists manage to capture the intricate details and textures of a sword on paper? How do they make it look so realistic? Join us as we unravel the secrets of sword drawing, and discover how you can create impressive sword illustrations using drawing tutorials and expert coloring tips.
Key Takeaways:
- Learn step-by-step instructions on how to draw a sword
- Explore tips for shading and coloring your sword drawing
- Discover techniques to add texture and depth to your artwork
- Find out how to personalize your sword drawing and make it unique
- Enhance your drawing with background settings and final touches
Tips for Preparing to Draw a Sword
Before you embark on the exciting journey of drawing a sword, it’s essential to prepare yourself with the right tools and inspiration. By gathering the necessary art supplies and referencing real swords, you can set yourself up for success in creating a stunning sword drawing.
Gather Your Art Supplies
To bring your sword drawing to life, you’ll need a variety of art supplies. Here are some essentials:
- Pencils: Opt for a range of graphite pencils with different degrees of hardness (e.g., 2H, HB, 2B) to achieve various line intensities and shading effects.
- Pens: Consider using fine-tipped pens for adding intricate details and a bold, consistent line quality to your sword drawing.
- Erasers: Have both kneaded erasers and vinyl erasers on hand to correct mistakes and blend graphite for smooth shading.
Find Inspiration through Reference Images
While you may have an image of a sword in your mind, referencing real swords can provide valuable inspiration and help you add unique details to your drawing. Search online or visit a local library to find high-quality reference images that capture the essence of different sword designs.
“Referencing real swords can give your drawing an authentic touch and allow you to explore different styles and historical periods.”
Having a collection of reference images at your disposal will enable you to capture the intricacies of hilt designs, blade shapes, and unique embellishments. Use these references to enhance the visual accuracy and overall appeal of your sword drawing.
Prepare to Unleash Your Creativity
By properly preparing for your sword drawing, you can ensure a smoother and more enjoyable artistic experience. Gather your art supplies, find inspiration through reference images, and get ready to unleash your creativity onto the canvas. With these tips in mind, you’re ready to take the first step towards creating a magnificent sword drawing.
Step-by-Step Guide: Drawing the Handle
Now that you have gathered your art supplies and reference images, it’s time to start drawing the handle of your sword. This step is crucial as it lays the foundation for the rest of your sword drawing. Follow these simple steps to create a realistic and detailed handle:
- Begin by sketching a narrow cylinder shape in the desired length of your handle. This will be the main body of the handle.
- Add an oval shape at the end of the handle to represent the pommel. The pommel is often designed to enhance grip or serve as a decorative element.
- Next, draw two guards on either side of the handle. The guards prevent the user’s hand from sliding onto the blade and add an aesthetic appeal to the overall design. You can sketch wing-like designs for a classic look.
Take your time with each step, paying attention to proportion and symmetry. A well-drawn handle will serve as the anchor for the rest of your sword drawing. Remember, practice makes perfect, so don’t be afraid to make adjustments and refine your lines as needed.
Once you have completed drawing the handle, you can proceed to the next section to learn how to draw the blade of your sword.
Pro Tip: To make your handle even more realistic, study different types of sword handles and their unique designs. This will give you inspiration and help you add intricate details to your drawing.

| Step | Description |
|---|---|
| 1 | Sketch a narrow cylinder shape for the handle. |
| 2 | Add an oval shape at the end for the pommel. |
| 3 | Draw two guards on either side using wing-like designs. |
Step-by-Step Guide: Drawing the Blade
Now that you have completed drawing the handle of your sword, it’s time to focus on the blade. The blade is the most iconic part of the sword and plays a crucial role in defining its overall design. Follow these steps to create a stunning and realistic blade for your sword drawing:
- Start by drawing a long, sharp-edged blade extending from the handle. The blade can be straight or slightly curved, depending on the type of sword you want to depict.
- Add the outlines and details to the blade. Pay attention to the shape and proportions to ensure accuracy. Use reference images if needed to capture the intricate details of different blade designs.
- Consider adding engravings or decorative elements to the blade. These details can enhance the visual appeal of your sword drawing and add a touch of uniqueness to your design.
Remember to maintain a steady hand and pay attention to the fine details while drawing the blade. This will help you achieve a polished and professional look. Take your time and don’t rush the process.
Tip: Experiment with different blade shapes and designs to explore various styles of swords. This will not only help you improve your drawing skills but also allow you to unleash your creativity.
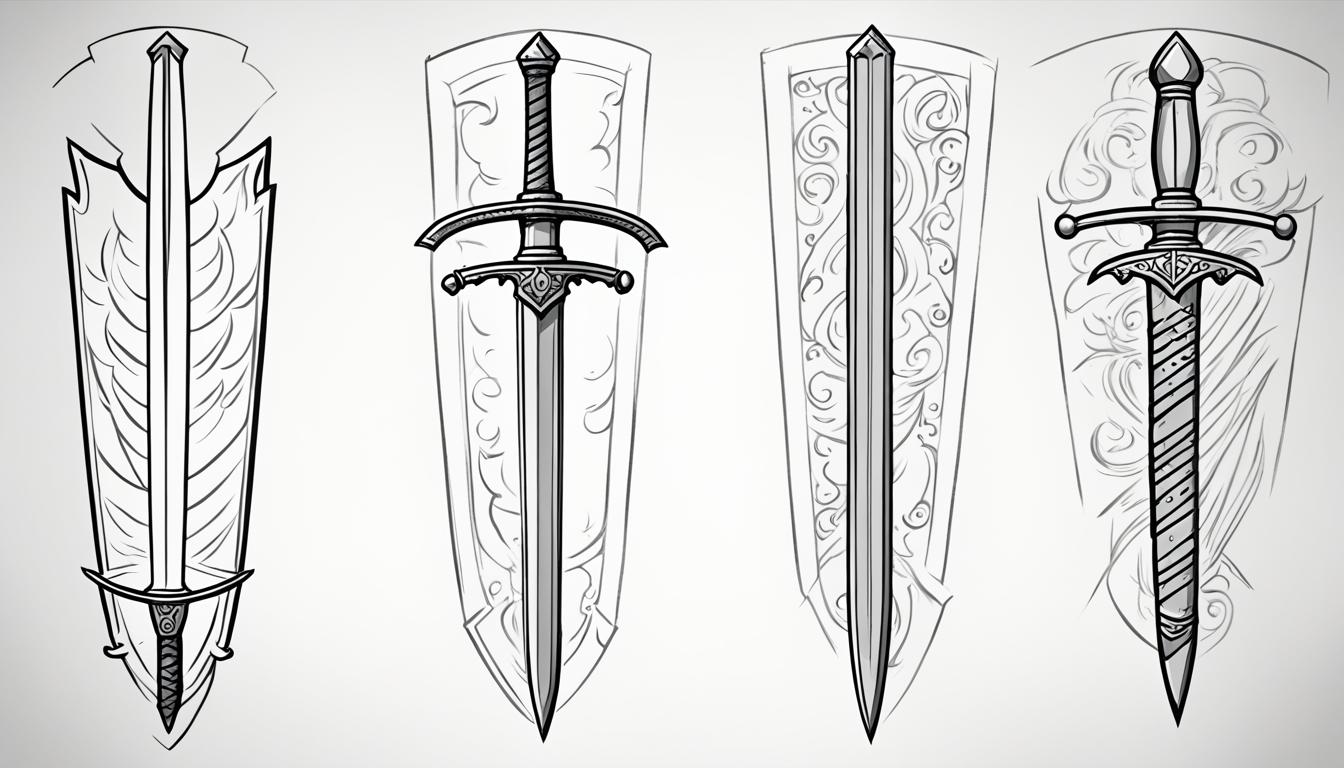
Example Blade Designs:
| Blade Design | Description |
|---|---|
 |
A classic double-edged straight blade commonly seen in medieval swords. |
|
A curved single-edged blade resembling the iconic katana. |
|
A wavy patterned blade known as a Damascus blade, featuring intricate swirling patterns. |
These are just a few examples to inspire you. Feel free to get creative with your blade design and make it truly unique.
Now that you have successfully drawn the blade, you can move on to the next step in bringing your sword drawing to life. Stay tuned for the upcoming section, where we will explore the process of adding texture and coloring to your artwork.
Step-by-Step Guide: Adding Texture and Coloring
After completing the outlines and details of your sword drawing, it’s time to bring it to life with texture and color. Adding texture will give your drawing depth and dimension, while applying color coats will make it visually appealing. Follow these steps to enhance your sword drawing:
Creating Texture
Start by using lines and shading techniques to add texture to different parts of the sword. Pay attention to the blade, handle, and guards. Use short, curved lines to create the appearance of metal texture on the blade. For the handle and guards, you can use crosshatching or stippling techniques to simulate various materials such as leather, wood, or metal.

Applying Color Coats
Once you’re satisfied with the texture, it’s time to apply the first coat of color to your sword drawing. Consider the materials you want to depict and choose appropriate colors. For the blade, metallic hues like silver or steel gray work well. Use warm or earthy tones for the handle, and vibrant colors for any jewels or embellishments. Apply the colors evenly, using either pencils, markers, or paint.
Coloring the Details
After applying the base colors, it’s time to add additional colors to the details of your sword drawing. Focus on the jewels, engravings, and any other intricate elements. Use complementary or contrasting colors to make the details stand out. Be mindful of light and shadow when coloring, as it will add depth and realism to your drawing. Consider using lighter shades to highlight certain areas and create a sense of dimension.
Here’s a flexible table to illustrate different color options for the blade and handle:
| Blade Color | Handle Color |
|---|---|
| Silver | Dark Brown |
| Steel Gray | Light Brown |
| Gleaming Gold | Black |
| Mysterious Blue | Deep Red |
Table: Color options for the blade and handle
Remember to let your creativity guide you when adding texture and color to your sword drawing. Experiment with different techniques and color combinations to achieve the desired effect. Have fun and enjoy the process of bringing your drawing to life!
Step-by-Step Guide: Adding Highlights and Shading
To add depth and dimension to your sword drawing, focus on shading. By applying shading techniques, you can bring realism and create a sense of volume. In this section, we will explore how to shade the handle, guards, and jewel details of your sword drawing. Additionally, we will learn how to emphasize the jewel shading to make them appear more vibrant and eye-catching.
Shading the Handle, Guards, and Jewel Details
When shading the handle, start by identifying the primary light source. The areas away from the light source will be darker, while the areas closer to it will receive more light and appear lighter. Use a black pencil or paint to carefully shade the handle, considering where the shadows and highlights would naturally fall.
For the guards, follow the same shading principles. Start with a light base layer of shading and gradually build up the darkness to create the desired effect. Pay attention to the contours of the guards and how they interact with the light source. Remember to blend the shading smoothly for a seamless look.
The jewel details can be further enhanced with shading. Begin by establishing the shape and contours of the jewels. Using a black pencil or paint, carefully shade the areas that would be in shadow, such as the sides or crevices. This will create depth and make the jewels stand out.
Tip: When shading, observe real-life objects or reference images to understand how light interacts with different surfaces. This will help you achieve a more realistic shading effect.
Emphasizing Jewel Shading
For the jewels in your sword drawing, it’s important to emphasize their shading to create a dazzling effect. After shading the jewels with black, use white paint or pencil to add highlights. Apply these highlights in areas where the light would directly hit the jewels, such as the top or reflective surfaces.
By adding highlights, you can make the jewels appear more vibrant and three-dimensional. Focus on creating contrast between the shaded areas and the highlighted areas to enhance the overall visual impact. Take your time and experiment with different levels of shading and highlighting to achieve the desired effect.
Remember, the key to successful highlighting and shading is to observe real-life examples and understand how light interacts with different surfaces. Practicing these techniques will help you master the art of creating depth and dimension in your sword drawings.
| Step | Technique |
|---|---|
| 1 | Shade the handle, guards, and jewel details using a black pencil or paint. |
| 2 | Add highlights to the jewels using white paint or pencil. |
| 3 | Create contrast between shaded and highlighted areas for a more dynamic effect. |
Continue practicing and experimenting with shading and highlighting to add depth and realism to your sword drawing. In the next section, we will explore how to take your sword drawing to the next level by adding additional elements such as a sheath or a character wielding the sword.

Taking Your Sword Drawing to the Next Level
If you’re looking to enhance your sword drawing and make it truly exceptional, there are several ways to take it to the next level. By adding a sheath, drawing a character, or personalizing the sword, you can add depth, uniqueness, and storytelling to your artwork. Let your imagination run wild and explore these exciting possibilities.
Adding a Sheath
A sheath is a protective covering for a sword, and incorporating it into your drawing can add a sense of realism and functionality. To draw a sheath, start by sketching a long, slender shape that matches the size and style of your sword. Pay attention to details such as the opening mechanism, decorative elements, and any straps or attachments. Drawing a sheath will not only add visual interest to your sword drawing but also provide context and story to your artwork.
Drawing a Character
To bring your sword drawing to life, consider incorporating a character wielding the sword. This could be a knight, a warrior, or any other character that suits your artistic vision. Position the character in a dynamic pose, holding the sword with confidence and determination. Pay attention to their facial expressions, body language, and clothing details to add depth and personality to your artwork. By adding a character, you can create a narrative and capture the essence of your sword’s purpose.
Personalizing the Sword
Make your sword drawing unique by personalizing it with engravings or other decorative elements. Engravings can depict symbols, patterns, or even words that hold personal significance or contribute to the story of your sword. Pay attention to the size, placement, and intricacy of the engravings to ensure they complement the overall design. You can also add gemstones, inlays, or other embellishments to make your sword truly one-of-a-kind. Personalizing your sword will add a touch of craftsmanship and individuality to your drawing.
By incorporating a sheath, drawing a character, or personalizing the sword, you can elevate your sword drawing to new heights. These additional elements will not only make your artwork visually appealing but also add narrative and depth to your drawing. Let your creativity shine and enjoy the process of creating a truly remarkable sword drawing.

The Final Touches: Background and Setting
Enhance your sword drawing by adding a background or setting. The right background can add depth and context to your artwork, making it more visually appealing and engaging. Consider the setting and atmosphere that best complements your sword drawing, whether it’s a stone setting reminiscent of the King Arthur myth or a medieval weapons rack with other historical artifacts. The choice is yours to create a unique and captivating composition.
When choosing a background, think about the story or theme behind your sword drawing. Is it a mythical sword wielded by a legendary hero? In that case, a backdrop of an ancient castle or misty mountains could enhance the mystical aura. On the other hand, if you want to showcase the sword’s craftsmanship and historical context, a display with other medieval weapons can create a compelling visual contrast.
Take a moment to visualize the scene you want to create. It could be a serene forest clearing, a grand battlefield, or even a dimly lit chamber. By adding these elements, you not only enhance the overall composition of your drawing but also provide viewers with a glimpse into the world of your sword.
Stone Setting
If you decide to create a stone setting, you can place your sword in a mystical location, surrounded by ancient stones and symbols. Here, the 32_6.png” alt=”stone setting” /> provides an example of the type of atmosphere you can create. The stones can have intricate carvings and mysterious inscriptions, further emphasizing the mythical nature of your sword. Make sure to pay attention to the lighting and shadows, as they can significantly impact the mood and atmosphere of the scene.
Medieval Weapons Rack
Another option is to position your sword on a medieval weapons rack to showcase its historical significance. This allows you to add additional detail and context to your drawing by including other weapons, such as daggers, axes, or armor. The arrangement of the weapons can create visually interesting patterns and textures.
Keep in mind that the background and setting should complement your sword drawing without overpowering it. The focus should still primarily be on the sword, while the background adds depth and enhances the overall composition. Take your time with this final touch and experiment with different backgrounds and settings until you find the perfect fit for your sword drawing.
Completing Your Sword Drawing with Colors
Once the main details of your sword drawing are complete, it’s time to focus on coloring. Applying a second coat of color will enhance the vibrancy of the blade, handle, and other elements. It’s important to pay attention to the coloring of the details, such as the jewels and engravings, as they add depth and realism to your sword drawing.
Utilize different shades and tones to bring your artwork to life. Experiment with color combinations to create a visually captivating design. Remember, the second coat of color provides an opportunity to correct any mistakes or enhance the overall appearance of your drawing.
To color the details of your sword, approach each element with precision and care. Consider using a fine brush or pencil to add intricate details to the jewels and engravings. This level of attention will give your drawing a professional finish and make it visually captivating.
Don’t be afraid to blend colors to create gradients and highlights. This technique can add depth and dimension to your sword drawing, making it appear more realistic and dynamic.
Take a look at the example below to see how a second coat of color and attention to detail can transform a sword drawing:

| First Coat of Color | Second Coat of Color |
|---|---|
| Blade | Blade |
| Handle | Handle |
| Jewels | Jewels |
| Engravings | Engravings |
As you can see from the table, the second coat of color adds vibrancy and depth to the different parts of the sword. The jewels and engravings now stand out, enhancing the overall visual impact of the drawing. By coloring the details with precision, you can create a masterpiece that truly captures the essence of a sword.
Pro Tip:
When applying the second coat of color, take breaks and step back to assess your progress. This will allow you to make adjustments and ensure that the colors blend seamlessly.
Adding the Final Touches: Shading and Highlights
To make your sword drawing truly stand out, master the art of shading and highlighting. By skillfully shading the blade, you can create depth and dimension, giving your drawing a realistic and captivating appearance. Begin by using darker tones near the edges of the blade to create shadows, gradually lightening the tones as you move towards the center. This shading technique will make the blade appear three-dimensional, adding a sense of weight and presence to your artwork.
As you shade, pay close attention to the details of the sword, such as the shining jewels and intricate engravings. These elements are what make each sword unique and visually striking. Use a white paint or pencil to add highlights to the jewels and engravings, emphasizing their brilliance and making them visually pop from the page. The contrast created between the shadows and highlights will add depth and realism to your drawing.

The image above depicts an example of a perfectly shaded sword blade. The skillful shading creates an incredible sense of depth and dimension, making the blade come alive. Notice how the variations in tone, from dark to light, create the illusion of light playing off the surface of the blade, drawing the viewer’s attention to its exquisite details.
Remember, shading and highlighting are essential techniques that can take your sword drawing to the next level. Practice and experiment with different shading techniques to find what works best for you. With patience and dedication, you can master shading and highlighting, bringing your sword drawing to life and truly capturing the essence of this magnificent weapon.
Finalizing Your Sword Drawing
Once you’re satisfied with your sword drawing, it’s time to add the finishing touches to make it truly stand out. One optional yet effective step is to trace over the outlines with the corresponding colors. Tracing the outline helps to refine the lines and create a more polished look for your drawing. By taking your time and ensuring that every detail is perfectly represented, you can achieve a seamless and professional result.
Tracing the outline can be particularly beneficial if you’re aiming for a clean and precise drawing. It allows you to correct any inaccuracies or imperfections in the original sketch, ensuring that your final sword drawing is flawless. This technique is especially useful if you’re planning to display or showcase your artwork.
While tracing the outline can enhance the overall appearance of your sword drawing, it’s important to use the right colors and maintain consistency. Make sure to choose colors that complement your artwork and stay true to the original design. Use precise and controlled movements to trace over the lines, paying attention to detail and keeping the colors within the outlined areas.
Remember, practice makes perfect, and the more you refine your tracing skills, the better your final results will be. Don’t be discouraged if it takes some time to master this technique. With patience and dedication, your sword drawing will become a seamless masterpiece.

Prolonged tracing and meticulous use of colors can ultimately elevate your sword drawing from a simple sketch to a remarkable piece of art. The act of finalizing your drawing through seamless tracing ensures that your hard work pays off, resulting in a stunning portrayal of a sword.
Conclusion
In conclusion, learning how to draw a sword is a rewarding artistic journey that allows you to express your creativity and sharpen your drawing skills. By following the step-by-step instructions and incorporating the tips provided in this tutorial, you can confidently create your own unique sword drawing.
Remember, patience and practice are key to improving your artistic abilities. Whether you’re a beginner or an experienced artist, drawing a sword can be a fun and fulfilling project that showcases your talent. Embrace the process, let your imagination soar, and enjoy the satisfaction of bringing a sword to life on paper.
In summary, this tutorial has guided you through the essential steps of sketching, detailing, coloring, shading, and adding final touches to your sword drawing. By mastering these techniques, you can create a realistic and captivating artwork. So grab your art supplies, get inspired, and embark on your own sword drawing adventure today!


