How to Draw a Elephant – Drawing Turorials and Coloring Tips
Have you ever wondered how to capture the majestic beauty of an elephant through art? Drawing an elephant may seem like a daunting task, but with the right guidance and techniques, it can be a rewarding experience. In this article, we will provide you with step-by-step tutorials and valuable tips on how to draw an elephant, from simple beginner techniques to more advanced realistic drawings.
Dive into the world of elephant art as we explore different drawing methods, coloring techniques, and ways to add depth and texture to your artwork. Whether you are a beginner or an experienced artist, this article will equip you with the knowledge and inspiration to create stunning elephant drawings.
Key Takeaways:
- Learn step-by-step tutorials and tips for drawing an elephant, from beginner-friendly techniques to realistic drawings.
- Explore different coloring methods and create vibrant elephant artwork.
- Discover techniques for adding details, textures, and backgrounds to enhance your elephant drawings.
- Find out which drawing supplies are essential for creating stunning elephant art.
- Get inspired to unleash your creativity and take your elephant drawings to the next level.
Easy Elephant Drawing Tutorial for Beginners
Are you a beginner looking to learn how to draw an elephant? Look no further! In this easy elephant drawing tutorial, we will break down the process into simple steps that are perfect for beginners like you. By the end of this tutorial, you’ll be able to draw the body, head, ears, trunk, and other features of an elephant with confidence.
Gather Your Drawing Supplies
Before we begin, make sure you have the following drawing supplies:
- Pencil
- Eraser
- Sketchbook or drawing paper
Having the right supplies will make your drawing experience much smoother and enjoyable.
Step 1: Start with Basic Shapes
Begin by lightly sketching the basic shapes that make up the elephant’s body. Use circles and ovals to outline the head, body, and ears.
Pro tip: Don’t worry about perfection at this stage. These initial shapes will serve as a guide for the rest of your drawing.
Step 2: Refine the Outline
Using your initial shapes as a guide, start refining the outline of the elephant. Pay attention to the curves and angles of the body, making sure everything flows smoothly.
Pro tip: Use light, confident strokes. Don’t press too hard with your pencil, as you may need to make adjustments later.
Step 3: Add Details
Now it’s time to add the elephant’s facial features and other details. Focus on drawing the eyes, tusks, trunk, and ears. Take your time and observe the reference image or real-life elephant for accurate details.
Pro tip: Break down the details into smaller shapes. For example, draw the eyes as circles and the tusks as elongated triangles.
Step 4: Refine and Erase
Once you have added the details, take a step back and assess your drawing. Look for any areas that need refinement or adjustment. Use your eraser to make any necessary corrections.
Step 5: Finalize Your Drawing
After refining and erasing, you can now finalize your drawing by darkening the lines and adding shading if desired. Use hatching or cross-hatching techniques to create depth and volume.
Pro tip: Use a reference image or real-life elephant to help you with shading. Pay attention to the areas of light and shadow on the elephant’s body.
Congratulations, you’ve completed your easy elephant drawing! Take a moment to admire your artwork and share it with others.
| Supplies | Image |
|---|---|
| Pencil |  |
| Eraser |  |
| Sketchbook or drawing paper |  |
Realistic Elephant Drawing Tutorial
If you want to create a realistic elephant drawing, this tutorial is for you. We will share techniques and tricks for capturing the shape, proportions, and details of an elephant. You will learn how to draw realistic features such as the eyes, tusks, and wrinkles.
Creating a realistic elephant drawing requires attention to detail and an understanding of the animal’s anatomy. By following these step-by-step instructions, you will be able to bring your elephant drawing to life with stunning realism.
Gather Your Materials
Before you begin, make sure you have the following materials:
- Pencil
- Eraser
- Drawing paper
- Reference photo of an elephant
Gathering these materials will help you achieve accurate proportions and textures in your drawing.
Step 1: Outline the Basic Shape
Start by lightly sketching the basic shape of the elephant using basic geometric shapes. Use circles for the body and head, and ovals for the ears and trunk. Keep the lines light and loose, as you will be refining them in later steps.

Step 2: Refine the Shapes and Proportions
Once you are satisfied with the basic shape, start refining the shapes and proportions of the elephant. Pay close attention to the contours of the body, the curve of the trunk, and the placement of the ears. Use light strokes to add details and make adjustments as needed.
Step 3: Add Details and Features
Now it’s time to add the intricate details and features that make the elephant look realistic. Focus on the eyes, tusks, mouth, and wrinkles on the skin. Take your time and observe the reference photo carefully to capture the essence of the elephant’s features.
Step 4: Shade and Texture
To add depth and dimension to your drawing, use shading techniques to create shadows and highlights. Pay attention to the direction of the light source and use a combination of hatching, cross-hatching, and blending to achieve a realistic texture. Take your time with this step, as shading can make a significant difference in the overall realism of your drawing.
Step 5: Final Touches
Once you are satisfied with the shading and texture, take a step back and assess your drawing. Make any necessary adjustments and add any additional details to enhance the realism. Erase any remaining guidelines and clean up any smudges to present a polished final drawing.
“Drawing a realistic elephant requires patience and attention to detail. By following these techniques and tricks, you can create a stunning elephant drawing that captures the spirit and beauty of this magnificent animal.” – Emily Smith, Professional Artist
With practice and dedication, you can master the art of drawing realistic elephants. Keep experimenting with different techniques and continue to hone your skills. The key is to observe and study elephants, allowing you to create accurate and lifelike drawings.
Elephant Drawing Color Guide
Coloring an elephant drawing can bring it to life, adding depth and vibrancy to your artwork. In this section, we will provide a comprehensive color guide for drawing elephants, exploring various color choices for the skin and other intricate details that make elephants unique.
Coloring the Elephant’s Skin
The color of an elephant’s skin can vary, ranging from light gray to dark gray or even brownish-gray. Here are some color suggestions to help you achieve a realistic depiction:
| Color Shade | Color Description |
|---|---|
| Light Gray | The most common color for elephant skin, representing a lighter shade. |
| Dark Gray | A deeper shade of gray, suitable for shading and adding contrast. |
| Brownish-Gray | A warm and earthy tone, ideal for adding dimension to your drawing. |
Remember to blend the colors smoothly and layer them to create realistic textures and shades.
Adding Details to the Elephant’s Features
Elephants have distinct features that require careful attention to detail. Here are some color suggestions for specific parts of the elephant:
- Eyes: Use shades of brown or amber to depict the eyes, adding depth and expression.
- Tusks: For ivory tusks, use off-white or cream colors. You can add subtle shades of yellow or gray to create a natural look.
- Wrinkles and Wrinkled Skin: Lightly shade the wrinkles using a darker tone of the primary skin color to give the elephant’s skin texture and depth.
Highlighting the Elephant’s Habitat
Consider the environment in which your elephant resides when choosing colors for the background. In a grassland or savanna setting, shades of green and yellow can replicate the lush landscape. For a jungle scene, vibrant greens and pops of other tropical colors can create an immersive backdrop.

Remember, these suggestions serve as a starting point, and you can experiment with different color combinations to create your unique elephant drawing.
Step-by-Step Elephant Drawing Video Tutorial
If you’re a visual learner and prefer watching demonstrations, we have just the thing for you! Our step-by-step drawing video tutorial will guide you through the process of drawing an elephant with clear instructions and demonstrations. This tutorial is perfect for beginners and artists of all skill levels.
Follow along as our talented artist breaks down the drawing process into easy-to-follow steps. With this video tutorial, you’ll be able to create a beautiful elephant drawing in no time. So grab your sketchbook and pencils, and let’s get started!

Watching a step-by-step demonstration can provide valuable insights and guidance during the drawing process. You will have the opportunity to see the techniques in action and observe how each element of the elephant is constructed.
Whether it’s sketching the overall shape, adding details to the face, or capturing the texture of the skin, you’ll be able to follow along with ease. The video tutorial ensures that you don’t miss any important steps, allowing you to create a realistic and detailed elephant drawing.
Pro Tip: Pause the video at any point if you need more time to complete a particular step or want to study a specific technique in detail.
Benefits of a Video Tutorial for Drawing
There are several advantages to learning drawing techniques through a video tutorial:
- Visual Guidance: A video tutorial provides visual guidance, allowing you to see the artist’s techniques firsthand.
- Real-Time Instructions: You can follow along with the artist’s instructions as they work on each step of the drawing.
- Clear Demonstrations: The artist will clearly demonstrate how to draw each part of the elephant, making it easier for you to replicate the drawing.
- Replayability: You can replay specific sections of the video or watch the entire tutorial repeatedly until you feel confident with the drawing process.
By watching our step-by-step drawing video tutorial, you’ll gain valuable insights and techniques that can be applied not only to drawing elephants but also to other subjects in your artwork. So, get ready to sharpen your drawing skills and create impressive elephant drawings with our video tutorial!
Watercolor Resist Elephant Drawing
If you’re looking to explore different artistic techniques in your elephant drawing, why not try creating a stunning watercolor resist elephant? This technique involves using watercolor and a resist medium to create unique textures and effects that will bring your elephant to life.
To create a watercolor resist elephant, follow these simple steps:
- Gather your materials: You will need watercolor paints, watercolor paper, brushes, a resist medium (such as wax or masking fluid), and a reference image of an elephant.
- Prepare your paper: Start by stretching your watercolor paper to prevent it from warping when you apply watercolor. Soak the paper in water for a few minutes, then tape it down to a flat surface. Let it dry completely before moving on to the next step.
- Sketch your elephant: Use a light pencil to sketch the outline and basic shapes of your elephant. Pay attention to the proportions and details to ensure accuracy.
- Apply the resist medium: Using a brush or a fine-point resist pen, apply the resist medium to areas where you want to preserve the white of the paper. This can include highlights, outlines, or patterns on the elephant.
- Let it dry: Allow the resist medium to dry completely before moving on to the next step. This usually takes a few minutes, but follow the instructions on the packaging for specific drying times.
- Apply watercolor: Wet your brush and load it with watercolor paint. Apply the paint to the areas of your elephant where you didn’t apply the resist medium. Watch as the watercolor resists the areas where the resist medium was applied, creating interesting textures and effects.
- Add details: Once the initial wash of watercolor is dry, use smaller brushes and different colors to add details and shading to your elephant. Pay close attention to the reference image and observe how light and shadows interact with the elephant’s form.
- Let it dry and remove the resist: Allow the watercolor to dry completely. Once dry, gently rub or peel off the resist medium to reveal the preserved white areas of the paper. This will add contrast and enhance the overall effect of your watercolor resist elephant.

By using the watercolor resist technique, you can create a visually stunning and unique elephant drawing that showcases the interplay between color and texture. Have fun experimenting with different resist mediums, color palettes, and painting styles to make your watercolor resist elephant truly one-of-a-kind.
Drawing Supplies for Elephant Art
To create your elephant drawings, you will need the right drawing supplies. Having high-quality materials can make a significant difference in the outcome of your artwork. Here are some essential drawing supplies that we recommend for elephant art:
Paper:
Start with a sturdy paper that can handle different drawing techniques. Choose a heavyweight paper with a smooth surface for detailed drawings or a textured paper for adding depth and texture to your elephant art.
Pencils:
A set of graphite pencils in various hardness levels is ideal for sketching and shading. Use a lighter pencil (HB or 2H) for sketching and initial outlines, and darker pencils (2B to 6B) for adding shading and details.
Markers:
If you prefer bold lines and vibrant colors, consider using markers. Look for alcohol-based markers that blend well and offer a wide range of colors. These can be helpful for adding color to your elephant drawings.
Crayons:
Crayons are versatile and can add texture and depth to your elephant drawings. Experiment with different crayon types, such as oil pastels or wax crayons, to create unique effects and enhance your artwork.
Remember, the choice of drawing supplies ultimately depends on your personal preference and artistic style. Don’t be afraid to experiment and find the materials that work best for you.
Here is an example of some recommended drawing supplies:
| Item | Description |
|---|---|
| Paper | Link to recommended paper |
| Pencils | Link to recommended pencils |
| Markers | Link to recommended markers |
| Crayons | Link to recommended crayons |
Having the right drawing supplies can make your elephant art more enjoyable and help you achieve the desired results. Invest in quality materials that suit your artistic needs and don’t hesitate to try new techniques and experiment with different mediums. Happy drawing!

Drawing a Frontal View Elephant
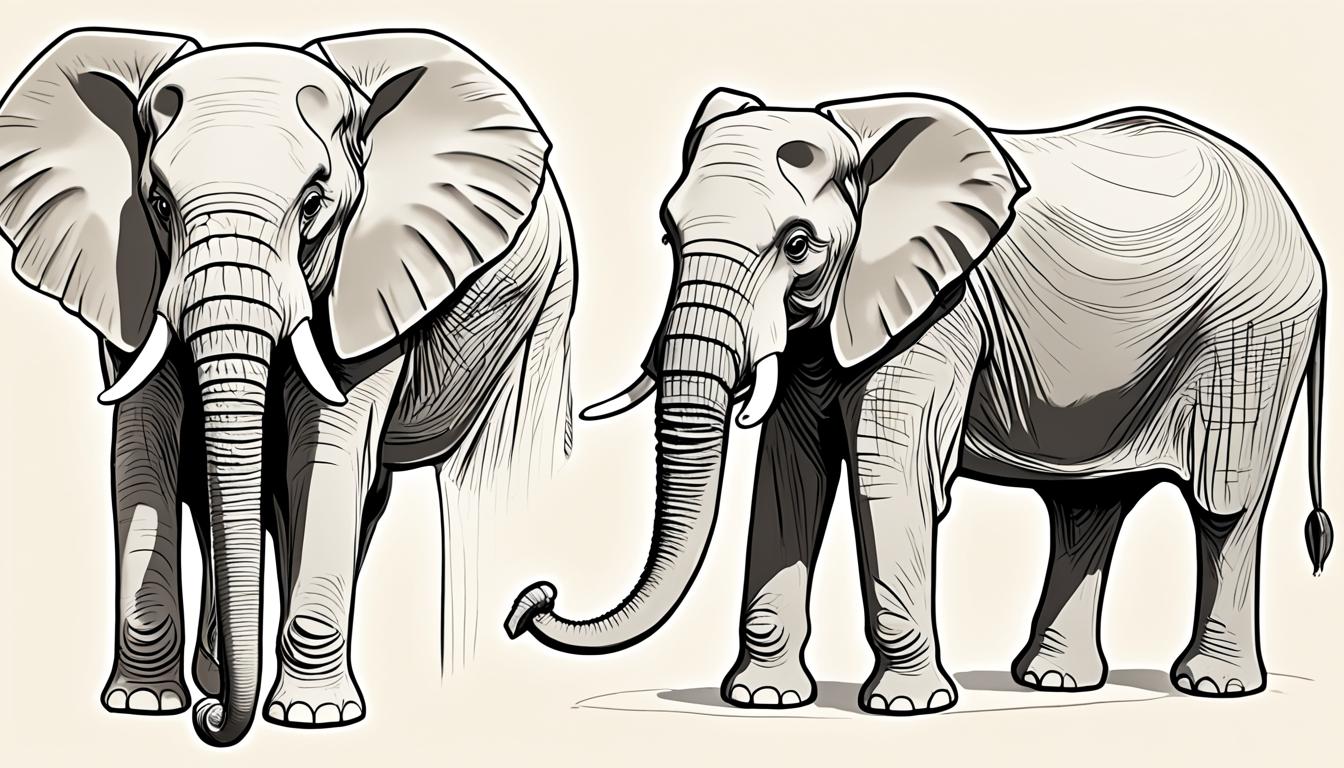
Drawing an elephant from a frontal view can be a bit more challenging due to the complex shapes and proportions. In this tutorial, we will guide you step by step through the process of drawing an elephant from a frontal view. By following these instructions, you’ll learn how to capture the unique features and details of the elephant’s face, including the tusks, eyes, and trunk.
Let’s get started!
Materials You’ll Need
- Pencil
- Eraser
- Drawing paper
Before we begin, ensure that you have all the necessary materials ready.

Step 1: Sketch the Basic Shapes
Start by drawing a large oval for the elephant’s body. Then, add a smaller oval for the head on top of the body, towards the center. These basic shapes will serve as the foundation for your drawing.
Step 2: Outline the Face
Next, outline the face within the smaller oval. Pay attention to the placement of the eyes, trunk, and tusks. Use light, gentle strokes to create the initial outlines.
Step 3: Add Facial Details
Now it’s time to add details to the face. Draw the eyes, tusks, and trunk, paying close attention to their proportions and placement. Remember to take your time and observe reference images for accuracy.
Step 4: Refine and Shade
After completing the basic facial features, take a step back and assess your drawing. Make any necessary adjustments to ensure the proportions are correct. Then, begin shading the different areas of the elephant’s face to create depth and highlights. Use light and dark shading techniques to add volume to the drawing.
Step 5: Fine-Tune the Details
In this final step, focus on adding finer details to enhance the realism of your drawing. Pay attention to the wrinkles, texture, and any other unique characteristics of the elephant’s face. Use lighter and darker shading to emphasize these details.
Congratulations! You have successfully drawn a frontal view of an elephant. Remember, practice makes perfect, so keep honing your skills and exploring different techniques to improve your drawings.
Adding Details and Textures to Your Elephant Drawing
To make your elephant drawing more realistic and visually interesting, it’s important to pay attention to the details and textures. Adding these elements will bring depth and character to your artwork. In this section, we will provide step-by-step instructions on how to incorporate details such as wrinkles, skin textures, and fur into your elephant drawing. Follow these techniques and tricks to create a stunning and lifelike representation of an elephant.
1. Emphasizing Wrinkles and Folds
One of the key features of an elephant’s skin is the wrinkles and folds that cover its body. To create these textures in your drawing, start by lightly sketching the wrinkles in the desired areas. Use short, curved lines to mimic the shape of the creases. Once you’re satisfied with the placement, darken the lines to enhance their visibility. Don’t forget to vary the lengths and depths of the wrinkles to make them look more natural.
2. Capturing Skin Textures
An elephant’s skin has a rough and rugged texture that can be a challenge to replicate in a drawing. To capture this texture, use short, overlapping strokes to fill in the skin areas. Vary the pressure of your pencil to create lighter and darker patches, mimicking the unevenness of the skin. Pay attention to the direction of the strokes, following the contours of the elephant’s body. This technique will add depth and realism to your drawing.
3. Creating Realistic Fur
While elephants don’t have a thick coat of fur like some other animals, they do have small patches of hair on their bodies. To create a realistic representation of this fur, use a combination of short, flicking strokes and small dots to indicate the hair. Focus on the areas where the hair is more prominent, such as the tuft at the end of the tail or around the ears. Use a light touch and build up the layers gradually to achieve a natural-looking texture.
| Detail or Texture | Technique |
|---|---|
| Wrinkles and Folds | Use short, curved lines to depict wrinkles and folds in the skin, varying the lengths and depths for a realistic effect. |
| Skin Textures | Fill in the skin areas with short, overlapping strokes, varying the pressure to create lighter and darker patches. |
| Realistic Fur | Combine short, flicking strokes and small dots to indicate patches of hair, focusing on areas where hair is more prominent. |
Remember, practice is key when it comes to adding details and textures to your elephant drawing. Take your time and experiment with different techniques to find what works best for you. With each drawing, you will improve and develop your own unique style. Now, let’s move on to the next section, where we will explore how to enhance your elephant drawing with backgrounds and additional characters.

Enhancing Your Elephant Drawing with Backgrounds and Additional Characters
Adding backgrounds and additional characters to your elephant drawing can take it to the next level, adding depth, context, and a sense of storytelling. By incorporating backgrounds and other characters, such as other animals or humans, you can create a more dynamic and engaging composition.
To enhance your elephant drawing with backgrounds, consider the environment in which the elephant would naturally be found. Is it in the wild, in a zoo, or in a specific habitat? Think about the landscape, vegetation, and other elements that can enrich the scene. You can use different drawing techniques and tricks to bring these backgrounds to life, adding detail and texture to create a realistic setting.
Additionally, including additional characters in your elephant drawing can add interest and narrative. You can draw other animals that complement the elephant, showing their interaction or relationship. For example, a playful monkey swinging from a tree branch or a flock of birds flying overhead can create a dynamic and harmonious composition.
When incorporating backgrounds and additional characters in your elephant drawing, consider the placement and scale of each element. The background should not overpower the main subject, but rather provide a visually balanced composition. Experiment with different gestural marks, shading techniques, and perspective to create depth and realism.
To inspire you in incorporating backgrounds and additional characters into your elephant drawings, here are some ideas:
- Create an African savannah scene with elephants grazing in the background, surrounded by tall grass and acacia trees.
- Depict an elephant bathing in a river, with birds perched on nearby branches and fish swimming in the water.
- Show an elephant family in their natural habitat, surrounded by other wildlife like zebras, giraffes, and lions.
- Draw an elephant in a zoo setting, with visitors observing and capturing the moment.
Remember, the key to enhancing your elephant drawing with backgrounds and additional characters is to be creative and imaginative. Take inspiration from reference photos, nature documentaries, and your own observations. By incorporating these elements, you can create a unique and captivating elephant drawing that tells a story.

Example Elephant Drawing with Background and Additional Characters:
| Subject | Description |
|---|---|
| Elephant | A majestic African elephant standing tall and proud. |
| Background | A vast savannah with tall grass, scattered acacia trees, and distant mountains. |
| Additional Characters |
|
| Composition | The elephant is the focal point, positioned slightly off-center. The background and additional characters are strategically placed to create a balanced and visually appealing composition. |
By incorporating a carefully designed background and additional characters, this elephant drawing captures the essence of an African safari, showcasing the interconnectedness of different species in their natural habitat.
Tips for Making Your Elephant Drawing Easy and Fun
Drawing an elephant can be a challenge, especially for beginners. However, with the right tips and techniques, it can become an enjoyable and rewarding experience. Here are three helpful tips to make your elephant drawing easier and more fun:
- Take it slow: Drawing an elephant requires attention to detail and capturing their unique anatomy. Start by sketching the basic shapes and proportions lightly, then gradually refine the details. Taking your time allows you to observe and replicate the intricate features of an elephant.
- Use pencil for sketching: When starting your elephant drawing, use a pencil to create initial sketches and outlines. Pencils offer flexibility and allow for easy adjustments and erasing as you refine your drawing. It’s a good practice to use light strokes at first, gradually building up the lines and shapes.
- Use reference photos for guidance: Reference photos can be incredibly helpful in capturing the essence and details of an elephant. Look for high-quality images that showcase different angles and poses. Study the elephant’s body proportions, wrinkles, and other distinct features. Use these references as a guide to inform your drawing and achieve a more accurate representation.
By following these tips, you’ll find that drawing an elephant becomes a fun and enjoyable experience. Remember to take your time, use pencil for sketching, and refer to high-quality images for guidance. With practice and patience, you’ll be able to create beautiful elephant drawings!

Conclusion
In conclusion, learning how to draw an elephant can be a delightful and rewarding artistic journey. Whether you are a beginner or have some drawing experience, our step-by-step tutorials and tips have provided you with the tools to create stunning elephant drawings.
Remember to have fun while drawing and don’t be afraid to experiment with different techniques. Use our beginner tips to build a solid foundation and then dive into more advanced elephant drawing techniques and tricks to capture the realistic details of these magnificent creatures.
Our color guide will help you bring your elephant drawings to life, adding depth and vibrancy. Whether you choose watercolors, markers, or colored pencils, don’t hesitate to explore different color choices and artistic styles.
Now, armed with your new drawing skills and knowledge, it’s time to unleash your creativity and transform blank canvases into captivating elephant artworks. Happy drawing!


