How to Draw a Diamond – Drawing Turorials and Coloring Tips
Have you ever wondered how to draw a diamond that shines and sparkles on paper? Drawing a diamond might seem like a daunting task, but with the right techniques, anyone can create a stunning diamond illustration. Whether you’re a beginner looking to learn the basics or an experienced artist seeking new tips, this step-by-step drawing tutorial will guide you through the process of drawing a realistic diamond. Are you ready to unleash your creativity and master the art of drawing a diamond?
Key Takeaways:
- Learning how to draw a diamond can be a rewarding artistic endeavor.
- Understanding the anatomy of a diamond is crucial for accurately portraying it in drawings.
- Follow step-by-step instructions to create a realistic diamond illustration.
- Coloring techniques and tips can make your diamond drawing stand out.
- Experiment with different diamond shapes to add variety and creativity to your drawings.
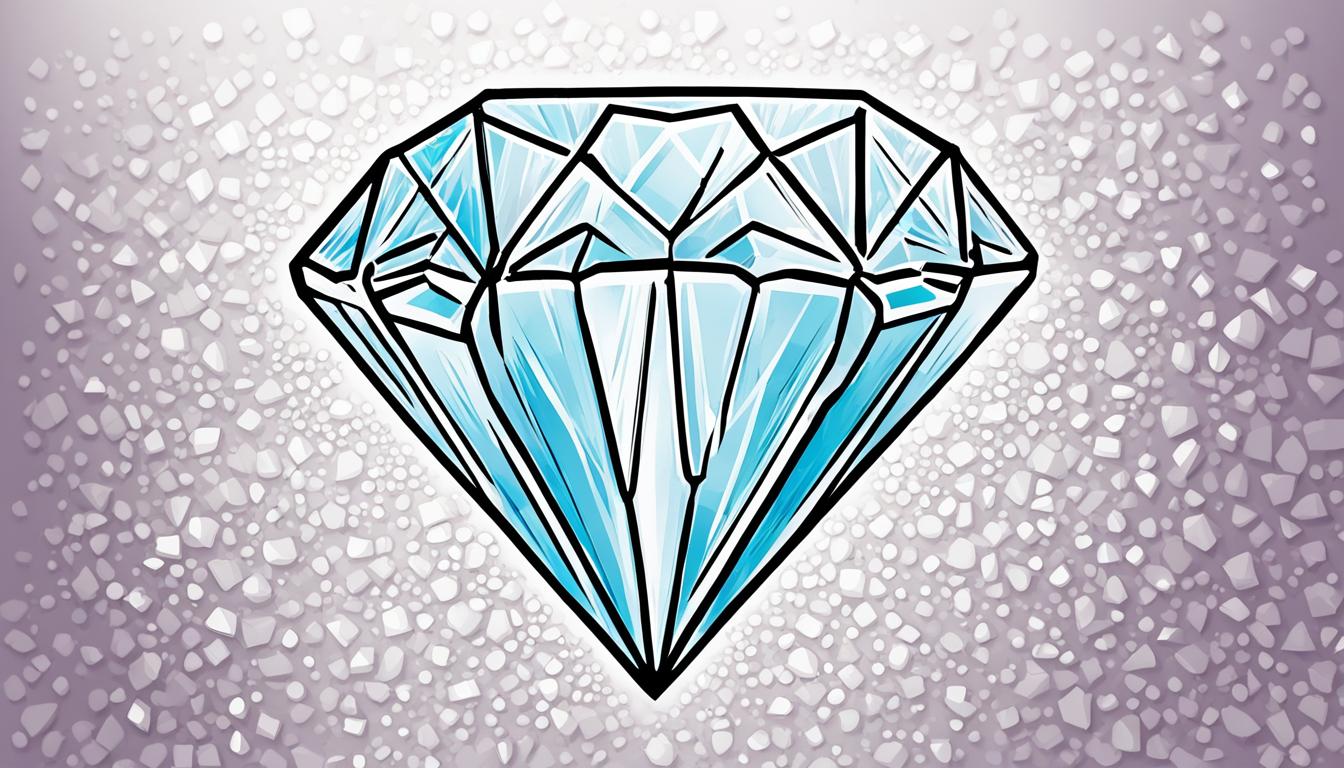
The Anatomy of a Diamond
Before diving into the drawing process, it’s important to understand the anatomy of a diamond. A diamond is composed of several parts, including the crown, girdle, and pavilion. Familiarizing yourself with these different parts will help you accurately portray them in your drawing.
The Anatomy of a Diamond:
| Part | Description |
|---|---|
| Crown | The top part of the diamond, often visible when worn as jewelry. |
| Girdle | The middle part that connects the crown and pavilion. |
| Pavilion | The bottom part of the diamond, usually hidden when set in jewelry. |
By understanding the diamond anatomy, you’ll be able to accurately depict the shape and proportions of each part in your drawing. This knowledge will contribute to creating a realistic and visually appealing diamond illustration.
Step-by-Step Instructions for Drawing a Diamond
Now, let’s get started on drawing a diamond. Follow these step-by-step instructions to create a realistic diamond illustration.
-
Step 1: Drawing the Table
Begin by drawing the top of the diamond, known as the table. This is a flat, square-shaped surface that forms the uppermost part of the diamond.
-
Step 2: Outlining the Crown and Girdle
Next, outline the crown and girdle of the diamond. Pay attention to their unique shapes. The crown is the upper portion of the diamond, while the girdle is the middle section that connects the crown and pavilion.
-
Step 3: Drawing the Facets
Move on to drawing the facets of the diamond. Pay special attention to the facets on the crown and pavilion, as they give the diamond its signature sparkle. These facets are typically triangular in shape.
-
Step 4: Adding Details and Shading
Finally, add any additional details and shading to make your diamond drawing come to life. Focus on capturing the depth and brilliance of the diamond by using shading techniques to create highlights and shadows.
With these step-by-step instructions, you’ll be able to create a beautiful diamond illustration. Practice and experiment with different techniques to develop your own unique style. The possibilities are endless!

| Materials Needed | Instructions |
|---|---|
| Pencil | Start by lightly sketching the basic shapes of the diamond. |
| Eraser | Erase any unnecessary lines or mistakes as you go along. |
| Black pen or fine liner | Trace over your pencil lines to create a more defined outline. |
| Coloring materials (optional) | Add color to your diamond drawing to make it more vibrant and realistic. |
Tips for Coloring Your Diamond Drawing
Coloring your diamond drawing is an important step in bringing it to life. Here are some key tips to make your diamond shine:
- Aim for high contrast: Choose colors that create a striking contrast to make your diamond stand out. Use dark and light shades to highlight different facets and angles.
- Add shading and highlights: To create a three-dimensional effect, add shading to the areas that would be darker and highlights to the areas that would catch the light.
- Consider the light source: Imagine where the light is coming from and shade your diamond accordingly. This will add depth and realism to your drawing.
- Experiment with coloring techniques: Try different mediums such as colored pencils, paints, or markers to achieve the desired effect. Each medium can create a unique look and texture.
- Add sparkle and reflection: Don’t be afraid to make your diamond shine even more by incorporating glitter or reflective accents. This will make your drawing truly sparkle.
With these tips in mind, you can bring your diamond drawing to life with vibrant colors and captivating sparkle.

Different Diamond Shapes to Try
Diamonds are renowned for their exquisite beauty, and one of the factors that contribute to their allure is their unique shapes. While the classic round brilliant cut is undoubtedly popular, there are several other diamond shapes that offer a distinct and captivating appeal. Exploring these different shapes allows artists to infuse variety and creativity into their diamond drawings. Although each shape requires slight variations in the drawing process, the overall techniques remain the same. So, let’s delve into the fascinating world of diamond shapes and discover new possibilities for your artwork.
- Emerald Cut: With its rectangular shape and stepped facets, the emerald cut diamond exudes elegance and sophistication. This shape is known for its stunning symmetry and clean lines, making it a popular choice for both vintage and modern designs.
- Heart Cut: The heart cut diamond is a symbol of love and romance. Its unique shape, resembling a heart, adds a touch of whimsy and sentimentality to any drawing. This shape requires careful attention to detail to accurately capture the curves and proportions.
- Pear Cut: Also known as the teardrop shape, the pear cut diamond offers a graceful and elongated silhouette. Its versatility allows artists to incorporate it into various compositions, creating a sense of fluidity and movement in their drawings.
These are just a few examples of the many diamond shapes available to artists. By experimenting with different shapes, you can expand your artistic repertoire and bring a fresh perspective to your diamond drawings. Each shape presents a unique challenge and opportunity for creative expression.
| Diamond Shape | Characteristics | Example Image |
|---|---|---|
| Emerald Cut | Rectangular shape with stepped facets |  |
| Heart Cut | Heart-shaped with curved edges |  |
| Pear Cut | Combination of a round and marquise shape |  |
Don’t limit yourself to the well-known diamond shapes; feel free to explore and create your own unique designs. Whether you’re drawing a classic round brilliant cut or experimenting with unconventional shapes, the underlying techniques remain the same. Embrace the versatility of diamonds and let your creativity shine through!
Incorporating Diamonds into Jewelry Designs
Diamonds are not only exquisite gemstones; they are also widely used in jewelry designs to add a touch of elegance and sophistication. Whether you are a budding artist or an experienced illustrator, learning how to draw diamond jewelry can take your artwork to a whole new level. By understanding the basic structures and settings of jewelry, you can create stunning designs that bring your diamond drawings to life.
When it comes to diamond jewelry design, there are endless possibilities. From dazzling rings to stunning earrings and necklaces, the options are vast. Let your creativity soar as you experiment with different types of diamond jewelry. Whether you want to draw a solitaire diamond ring or a pendant necklace adorned with sparkling diamonds, the choice is yours.
To make your diamond jewelry drawings more realistic, it’s important to familiarize yourself with different settings commonly used in jewelry design. Two popular settings are the prong setting and the bezel setting.
The prong setting involves securing the diamond in place using small metal prongs. This setting allows more light to pass through the diamond, enhancing its brilliance and sparkle. To draw a diamond in a prong setting, show the prongs delicately holding the gemstone in place.
On the other hand, the bezel setting involves framing the diamond with a thin metal band that surrounds the entire perimeter of the gemstone. This setting offers a sleek and modern look, providing excellent protection for the diamond. When drawing a diamond in a bezel setting, accentuate the smooth metal band encircling the gemstone.
Example of Prong Setting
| Prong Setting |
|---|

|
Whether you choose the prong setting or the bezel setting, make sure to pay attention to details. Add intricate designs and textures to the metal bands, such as engravings or filigree work, to make your diamond jewelry drawings truly captivating.
Incorporating diamonds into your jewelry designs allows you to express your creativity and showcase the beauty of these exquisite gemstones. Let your imagination run wild and experiment with various styles, settings, and compositions. As you develop your skills in drawing diamond jewelry, you’ll be able to create breathtaking designs that captivate the eyes and hearts of those who admire your artwork.
Adding Sparkle and Reflection to Your Diamond Drawing
To make your diamond drawing truly sparkle, it’s important to add the right amount of shine and reflection. By considering the direction of the light source and incorporating highlights, you can bring your diamond illustration to life. Furthermore, utilizing techniques like stippling or cross-hatching can create the characteristic sparkle that diamonds are known for.
When rendering reflective surfaces and facets, pay careful attention to capturing the way light interacts with the diamond. This will help create a sense of depth and realism in your drawing. Experiment with different shading techniques to achieve the desired level of shine and sparkle, enhancing the overall brilliance of your diamond.

Highlighting the Diamonds’ Brilliance
Add highlights to your diamond drawing to showcase its brilliance. By strategically placing lighter tones or white areas in your drawing, you can capture the way light reflects off the diamond’s facets. This technique will help enhance the overall sparkle and make your drawing more dynamic.
- Identify the light source in your drawing, which will determine the placement of highlights.
- Use a lighter pencil or brush to add highlights to specific areas, such as the facets and edges of the diamond.
- Blend the highlights gently with the surrounding shading to create a natural and realistic effect.
Creating Diamond Sparkle with Stippling and Cross-Hatching
Stippling and cross-hatching are techniques that can add texture and sparkle to your diamond drawing. These methods involve creating patterns of dots or lines to simulate the play of light and shadows on the diamond’s surface.
“Stippling and cross-hatching are fantastic techniques for capturing the diamond’s sparkle and adding depth to your drawing.” – Amy Johnson, Professional Artist
- For stippling, use a fine-tipped pen or a small brush to create a series of small, closely spaced dots. Vary the density and size of the dots to create different levels of sparkle and shine.
- Cross-hatching involves drawing parallel lines and then adding additional lines at different angles to create a mesh-like pattern. This technique can be used to convey the facets and reflectivity of the diamond.
- Experiment with different densities and angles of the lines or dots to achieve the desired level of sparkle and reflection.
Remember to observe real diamonds or reference images to study how light interacts with their surfaces. This will help you accurately capture the diamond’s sparkle and reflection in your drawing. With practice and attention to detail, you can create a dazzling diamond illustration that truly shines.
Enhancing Your Diamond Drawing with Details
The key to creating a realistic diamond drawing lies in the diamond drawing details. Paying attention to the facets, cuts, and angles of the diamond will bring your drawing to life. Use precise lines and shading techniques to capture the intricate details of the diamond’s structure. Adding reflections or imperfections will add depth and make your drawing more dynamic and lifelike. Remember, the more attention you give to the details, the more realistic your diamond drawing will appear.

| Detail | Description |
|---|---|
| Facets | Pay close attention to the arrangement and shape of the diamond’s facets. This will determine how the light interacts with the diamond. |
| Cuts | Properly depicting the different cuts, such as round, princess, or emerald, will give your diamond drawing a realistic look. |
| Angles | Consider the angles at which light reflects off the diamond. Adding shadows and highlights accordingly will enhance the overall appearance. |
| Reflections and Imperfections | To add authenticity, include reflections and imperfections, such as scratches or inclusions, to make your diamond drawing more lifelike. |
By focusing on these diamond drawing details, you can take your artwork to the next level. Utilize precise lines, shading, and additional intricacies to create a superbly realistic diamond illustration.
Showcasing Your Diamond Drawing
Once you have completed your diamond drawing, it’s time to showcase your artwork. Sharing your creation allows others to appreciate the beauty and skill behind your diamond drawing. Consider the following ways to display and share your masterpiece:
Framing Your Drawing
To give your diamond drawing a professional touch, consider framing it. A well-chosen frame can enhance the overall presentation and make your artwork stand out. Opt for a frame that complements the colors and style of your diamond drawing, and make sure to protect it with a sheet of glass or acrylic.
Creating a Digital Portfolio
Take advantage of the digital era by creating a digital portfolio to showcase your diamond drawing. You can create a personal website or use online platforms dedicated to art. Upload high-quality images of your artwork and provide a brief description to engage viewers and potential art enthusiasts.
Sharing on Social Media
Connect with a wider audience by sharing your diamond drawing on social media platforms. Upload your artwork to platforms like Instagram, Facebook, or Twitter, using relevant hashtags to reach art enthusiasts and fellow artists. Engage with your audience by responding to comments and feedback, fostering a supportive and creative community.
Participating in Art Contests or Exhibitions
Consider entering your diamond drawing into art contests or exhibitions. These opportunities provide a platform for recognition and exposure. Research local art competitions or galleries accepting submissions in your area. Participating in these events can help you gain valuable feedback, connect with other artists, and potentially sell your artwork.

Building an Art Network
Become an active member of art communities, both online and offline. Engage with fellow artists, share your diamond drawing, and provide feedback on others’ work. Building relationships within the art community can lead to collaborations, learning opportunities, and exposure to new artistic styles and techniques.
Remember, showcasing your diamond drawing allows you to celebrate your talent, receive valuable feedback, and connect with a wider audience. Choose the method that best suits your preferences and start sharing your dazzling diamond artwork today!
Conclusion
Drawing a diamond may seem challenging, but with practice and the right techniques, anyone can create a stunning diamond illustration. By following the step-by-step instructions in this guide and incorporating the tips and tricks for coloring and adding sparkle, you will be able to draw diamonds that truly come to life.
Remember to take your time, paying attention to the details, such as the diamond’s anatomy, facets, and angles. The key to creating a realistic diamond drawing lies in capturing these intricate features through precise lines and shading. Don’t be afraid to experiment with different diamond shapes and jewelry designs to showcase your creativity and personal style.
Whether you’re drawing diamonds for personal enjoyment or as a professional artist, the techniques and insights shared in this guide will help you improve your drawing skills and create beautiful diamond artwork. So, grab your pencils, get inspired, and start drawing your own dazzling diamonds today!


