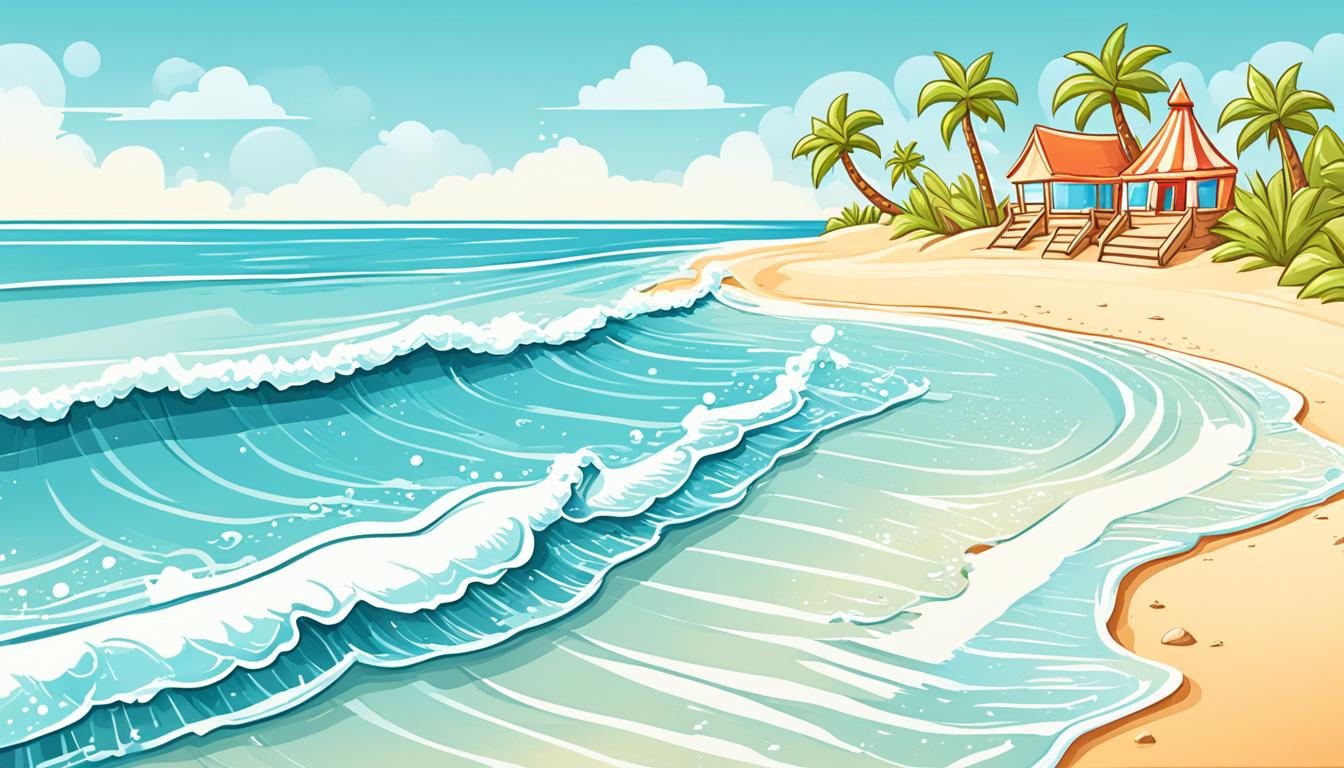
How to Draw a Beach – Drawing Turorials and Coloring Tips
Have you ever wanted to capture the beauty of a beach on paper? Whether you’re a seasoned artist or a beginner, learning how to draw a beach can be an incredibly rewarding experience. But where do you start? How do you create those realistic waves, soft sand, and vibrant colors?
In this guide, we will take you on a journey through step-by-step tutorials and share valuable tips for adding color to your artwork. From capturing the essence of a serene sunset to depicting the lively energy of crashing waves, you’ll discover techniques that will bring your beach drawings to life.
So, are you ready to dive into the world of beach drawing? Let’s get started!
Key Takeaways:
- Learn how to create a realistic and beautiful beach landscape through step-by-step tutorials.
- Discover tips for adding color to your artwork and bringing your beach drawings to life.
- Explore artistic techniques for capturing the texture of sand, the movement of waves, and the beauty of the ocean.
- Master shading techniques to add depth and dimension to your beach drawings.
- Enhance your drawing skills and create stunning beach masterpieces.
Beginner’s Guide to Drawing a Beach Scene
Are you ready to dive into the world of beach drawing? This beginner’s guide will take you step by step through the process of creating a stunning beach scene. From the mesmerizing waves to the colorful umbrellas, you’ll learn all the techniques needed to bring your artwork to life.
Let’s get started with the first step:
Step 1: Drawing the Horizon Line
The horizon line is an essential element in any beach scene. It represents the point where the sky meets the ocean. Use a ruler or a straight edge to draw a horizontal line across your paper, slightly above the center. This will serve as the foundation for your drawing.
Step 2: Adding the Sand
Next, it’s time to add the sandy beach. Start by drawing curved lines along the bottom half of your paper to represent the shoreline. Then, add texture to the sand by using short, diagonal strokes. Vary the direction and length of your strokes to create a realistic effect.
Step 3: Creating the Waves
The waves are what bring a beach scene to life. To draw them, begin by sketching curved lines just above the horizon line. These lines will serve as the guide for the shape of your waves. Add more detail by adding smaller curves within the larger ones to represent the movement of the water. Don’t forget to use varying line thickness and length to give your waves depth and dimension.
Step 4: Adding Details
Now that you have the basic elements of your beach scene, it’s time to add some details. Draw colorful beach umbrellas along the shore, add beach chairs, and maybe even a sandcastle or two. Remember to use perspective and scale to make your drawings appear realistic.
Step 5: Bringing it to Life with Color
Finally, it’s time to add color to your beach scene. Use your favorite art supplies, whether it’s colored pencils, markers, or watercolors, to bring vibrant hues to your drawing. Experiment with blending and shading techniques to create depth and realism in your artwork.
With these step-by-step instructions, you’ll be able to create an impressive beach drawing that will transport viewers to a sunny seaside getaway. So grab your pencils and get ready to embark on a creative journey!
Remember, practice makes perfect, so don’t be afraid to experiment and try new things.
“A beach scene has the power to evoke a sense of tranquility and relaxation. By following this beginner’s guide, you’ll be able to capture the essence of a beach on paper and create an artwork that transports viewers to their favorite coastal retreat.” – Artistic Mind Magazine
| Materials | Techniques | Tips |
|---|---|---|
| Pencils (HB, 2B, 4B) | Blending | Start with light pencil strokes and gradually build up the layers for a more realistic effect. |
| Colored pencils or markers | Shading | Use different pressure to vary the intensity of colors and create shadows and highlights. |
| Watercolor paints | Wet-on-wet technique | Apply a wet base layer of color and then add details using a drier brush for a beautiful watercolor effect. |
With practice and patience, you’ll soon be able to create breathtaking beach scenes that showcase your artistic talent. So grab your sketchbook and start your journey to becoming a beach drawing pro!
Artistic Guide to Drawing Beach Landscapes
Are you ready to take your beach drawings to the next level? In this section, we will explore artistic techniques that will enable you to create stunning beach landscapes. From the texture of sand to the movement of waves, you will learn how to capture the beauty of the ocean in your artwork. These tutorials are perfect for beginners who want to enhance their skills and create realistic and breathtaking beach drawings.
Capturing the Texture of Sand
When drawing a beach landscape, it’s essential to capture the texture of sand. To achieve this, try using cross-hatching or stippling techniques to depict the grains of sand. Experiment with different pencils or pens to create the desired effect. Remember to observe the direction and movement of the sand to make your drawing more realistic.
Creating Lifelike Waves
Waves are a vital element in beach landscapes, and drawing them realistically can add depth and energy to your artwork. Start by understanding the anatomy of a wave—how it rises, crests, and crashes. Use curved and flowing lines to depict the movement of waves and experiment with shading and highlighting to add volume and dimension. Observing reference images or studying the patterns of waves in real life can greatly enhance your understanding and ability to draw them.
Conveying the Beauty of the Ocean
The ocean is a mesmerizing subject in beach landscapes. To capture its beauty, pay attention to the colors and reflections. Use shades of blue and green to represent the depth and translucency of the water. Experiment with different brushstrokes or pencil techniques to convey the shifting patterns and reflections on the surface. Don’t be afraid to add small details, such as tiny ripples or sunlight glinting off the waves, to make your drawing more captivating.
“Drawing a beach landscape is not just about replicating what you see; it’s about evoking the feeling of being in that moment – the warmth of the sun, the sound of crashing waves, and the serenity of the ocean. Let your creativity flow and infuse your drawing with your own unique style and emotions.”
Remember, practice is key when it comes to mastering beach art techniques. Take the time to observe, sketch, and experiment with different mediums until you find what works best for you. Don’t be afraid to make mistakes, as they are part of the learning process. With dedication and a willingness to explore your artistic abilities, you’ll be creating stunning and realistic beach landscapes in no time.

Artistic Guide to Drawing Beach Landscapes
| Artistic Techniques | Benefits |
|---|---|
| Capturing the Texture of Sand | Enhances the realism of your beach drawings by accurately depicting the grains of sand. |
| Creating Lifelike Waves | Adds depth and energy to your artwork by accurately portraying the movement and characteristics of waves. |
| Conveying the Beauty of the Ocean | Translates the mesmerizing qualities of the ocean onto your drawing, including its colors, reflections, and textures. |
Tips for Adding Color to Beach Artwork
Enhance the beauty of your beach artwork by incorporating vibrant and realistic colors. Whether you prefer using paint or colored pencils, these tips and tricks will help you achieve stunning and lifelike beach scenes.
Mixing Paint for Realistic Results
When working with paint, it’s essential to master the art of color mixing. Follow these steps to create realistic colors for your beach artwork:
- Start with primary colors: Use your primary colors (red, blue, and yellow) as a base. Experiment with different ratios to achieve the desired shade.
- Adjust with secondary colors: If your color appears too bright or intense, add a small amount of the complementary color (opposite on the color wheel) to tone it down.
- Create depth with shades and highlights: Mix in black or white to create darker or lighter shades, respectively. This will add depth and dimension to your beach artwork.
Choosing the Right Colored Pencils
Colored pencils are a popular choice for adding color to artwork. Follow these tips when selecting colored pencils for your beach scenes:
- Invest in quality: Opt for artist-grade colored pencils that offer a wide range of colors and good color pay-off. They blend smoothly and produce vibrant results.
- Consider complementary colors: Select colored pencils that offer a good range of complementary colors to create contrast and balance in your beach artwork.
- Experiment with different textures: Try various types of colored pencils, such as soft core, watercolor, or oil-based pencils, to achieve different textures and effects.
Shading and Blending Techniques
Mastering shading and blending techniques will bring depth and realism to your beach artwork. Try these techniques to enhance your drawings:
“Shading and blending techniques create depth and dimension in beach artwork.”
| Technique | Description |
|---|---|
| Hatching/Cross-Hatching | Create shading by drawing parallel or intersecting lines. The closer the lines, the darker the shade. |
| Layering | Build up layers of color to achieve smooth transitions and blended effects. |
| Smudging/Blending Tools | Use blending tools like tortillons or cotton swabs to blend and soften colors for a seamless look. |
| Burnishing | Apply heavy pressure with a white or colorless pencil to smooth out the colors and create a glossy finish. |
With these tips and techniques, you have everything you need to add impressive colors to your beach artwork. So grab your brushes or colored pencils, unleash your creativity, and bring the beauty of the beach to life on your canvas or paper!

Step-by-Step Tutorial for Drawing a Sea Shell
Are you ready to dive into the intricate world of sea shell drawing? In this step-by-step tutorial, you’ll learn how to create a detailed and realistic sea shell masterpiece. Follow along and discover the secrets to capturing the beauty of these fascinating ocean treasures.
Before we begin, make sure you have your drawing supplies ready. You’ll need a pencil, eraser, paper, and any additional drawing tools you prefer, such as fine liners or colored pencils. Let’s get started!
Gather Your Inspiration
First, take a moment to observe different types of sea shells. Look for references in books or online to get a better understanding of the different shapes, textures, and patterns. Pay attention to the fine details and unique characteristics of each shell.
Start with Basic Shapes
Begin by lightly sketching the basic shape of your sea shell. Most shells have a curved, conical form with spiral patterns. Use simple shapes like ovals, circles, or triangles to outline the overall structure of your shell.
Add the Intricate Patterns
The patterns on a sea shell are what make each one so unique. Start adding the intricate patterns by drawing small, curved lines that follow the shape of the shell. Pay close attention to the direction and spacing of the lines as they wrap around the shell.
Enhance with Highlights and Shadows
To create depth and realism, it’s important to add highlights and shadows to your sea shell drawing. Use your reference images to identify the areas where light hits the shell and where shadows are cast. Lightly shade the shadowed areas and use a white or light-colored pencil to add highlights where the light is reflected.
Remember to blend the shades and highlights with your pencil or blending tool for a smooth transition.
Finalize the Details
Now it’s time to refine the details of your sea shell drawing. Add any additional lines, textures, or colors to make your drawing more vibrant and lifelike. Pay attention to the smaller features, such as ridges, bumps, or intricate designs.
Take your time and enjoy the process of creating a stunning sea shell artwork.
And that’s it! You’ve successfully completed the step-by-step tutorial for drawing a sea shell. Feel free to experiment with different colors and techniques to add your own artistic touch. Happy drawing!

| Materials Needed | Tips and Techniques |
|---|---|
| – Pencil | – Start with light pencil strokes and gradually add darker lines and shading. |
| – Eraser | – Use an eraser to remove any unwanted lines or smudges. |
| – Paper | – Choose a high-quality drawing paper that can handle both pencil and colored pencil work. |
| – Fine liners or colored pencils (optional) | – Experiment with different drawing tools to achieve different effects. |
Drawing a Crab – Step-by-Step Guide
Learn how to draw a crab with this step-by-step guide. Whether you’re a beginner or an experienced artist, this tutorial will teach you the techniques required to create a lifelike crab drawing.
Drawing the Body and Legs
To begin, sketch a large oval shape for the crab’s body. Then, add six evenly spaced lines extending from the body to represent the legs. Make sure to add small triangles at the end of each leg to indicate the crab’s claws. Use these initial shapes as a foundation for the rest of your drawing.
Adding Details
Next, start adding details to your crab drawing. Use curved lines to define the body’s texture and add segments to the legs to give them a segmented appearance. Don’t forget to draw the eyes at the top of the body, and add smaller lines to indicate the mouth and other fine details.
Completing the Claws and Eyes
Focus on the crab’s claws by adding more definition and depth. Use curved lines to outline the shape of each claw, paying attention to the joints and curves. For the eyes, draw two small circles with smaller circles inside to represent the pupils. Add a sense of dimension by shading areas of the claws and eyes to create depth.
Tips: When drawing a crab, it’s important to pay attention to the symmetry of the body and legs. Take your time with each step, and don’t be afraid to make adjustments as you go. Remember, practice makes perfect!
Now you’re ready to add the finishing touches to your crab drawing, such as shading and refining the lines. Take a moment to observe real-life crabs or reference photos to capture the intricacies of their anatomy and textures. With practice, you’ll be able to create stunning crab illustrations that truly come to life on the page.

| Supplies Needed | Steps |
|---|---|
| Sketchbook | 1. Start with an oval for the body. |
| Pencil | 2. Draw six lines extending for the legs. |
| Eraser | 3. Add details to the body and legs. |
| Black pen or marker | 4. Complete the claws and eyes. |
| Colored pencils or markers (optional) | 5. Shade and refine your drawing. |
Drawing a Cartoon Fish – Easy and Fun Tutorial
Dive into the world of cartoon drawing with this fun and easy tutorial on how to draw a cartoon fish. Whether you’re a beginner looking to explore your artistic skills or simply want to have some creative fun, this step-by-step guide will help you bring a playful and colorful fish drawing to life.
To get started, you’ll need a few basic drawing supplies:
- Pencil
- Eraser
- Colored pencils or markers
- Sketch paper or a drawing pad
Once you have your supplies ready, follow these step-by-step instructions:
- Start by drawing a large oval shape for the body of the fish.
- Add a curved line near the top of the oval to create the fish’s back.
- Draw two large circular eyes on the front of the fish.
- Next, add a small triangle-shaped mouth just below the eyes.
- Draw a curved line below the mouth to create the fish’s smile.
- Now it’s time to add some fins! Draw two curved lines on each side of the fish to represent the pectoral and pelvic fins.
- Finish off the fish by drawing a triangle-shaped tail at the back.
- Once you’re happy with the basic shape of the fish, use your colored pencils or markers to add vibrant colors and patterns to your drawing.
- Feel free to get creative with your colors and patterns to make your cartoon fish truly unique!
Here’s an example of how your cartoon fish could look:
| Example of a Cartoon Fish |
|---|
 |
“Drawing a cartoon fish is a fun and creative way to explore your artistic skills. This simple tutorial allows you to bring a playful and colorful fish to life on paper. So grab your drawing supplies and start creating your own unique cartoon fish!”
Now that you’ve learned how to draw a cartoon fish, you can use this technique to create your own underwater world filled with vibrant and whimsical sea creatures. It’s a great way to let your imagination run wild and create fun and imaginative artworks.
Shading Techniques for Beach Drawings
Master the art of shading with these techniques specifically tailored for beach drawings. Shading is a crucial skill for creating realistic and captivating artwork. By understanding how light interacts with different surfaces, you can add depth and dimension to your beach scenes. Whether you’re using pencils, paints, or markers, these shading techniques will help you bring your beach drawings to life.
1. Understanding Light and Shadow
Before diving into shading techniques, it’s important to understand how light and shadow work. When drawing a beach scene, imagine a single light source, such as the sun, casting light onto the objects. The areas that receive direct light will be brighter, while the areas facing away from the light source will be in shadow.
2. Identifying the Key Elements for Shading
When shading a beach drawing, focus on key elements such as the sand, waves, and objects in the scene. Pay attention to the direction of the light source and visualize how it interacts with each element. This will guide you in determining where the lightest and darkest areas should be.
3. Creating Realistic Sand Texture
To create a realistic sand texture, use light, short strokes or dots to apply shading. Start with a base layer of lighter tones and gradually build up the shadows by layering darker tones. Pay attention to the contours and unevenness of the sand, creating variations in shading to mimic the texture.
4. Adding Depth to Waves
Waves are another important element in beach drawings. To add depth, use a combination of curved lines and shading techniques. Start by outlining the waves, then gradually add shading to create volume and form. Use lighter shades for the areas exposed to direct light and darker shades for the areas in shadow.
5. Enhancing Objects with Light and Shadow
When drawing palm trees, umbrellas, or other objects in your beach scene, pay attention to how light and shadow interact with them. Use shading techniques such as hatching, cross-hatching, or stippling to create the illusion of three-dimensionality. Experiment with different shading styles and observe how they impact the overall composition.

With these shading techniques, you can take your beach drawings to the next level. Practice diligently, observe the interplay between light and shadow, and experiment with different tools and styles to develop your unique artistic voice. By mastering shading, you’ll bring a sense of realism and depth to your beach artwork, capturing the beauty of the seaside in stunning detail.
Conclusion
Congratulations on completing this artistic guide to drawing beach landscapes! Throughout this article, we have provided you with step-by-step tutorials, valuable tips, and techniques to help you create stunning and realistic beach artwork. Whether you are a beginner or an experienced artist, these resources are designed to enhance your drawing skills and bring the beauty of the beach to life on paper.
By following the detailed instructions in the Beginner’s Guide to Drawing a Beach Scene, you can confidently create your own impressive beach drawings. From capturing the texture of sand to adding intricate details like umbrellas and waves, this guide is a comprehensive resource for bringing out your artistic talent.
Additionally, the Artistic Guide to Drawing Beach Landscapes dives deep into artistic techniques specific to beach scenery. The guide provides insights on how to depict the movement of waves, the texture of sand, and the overall atmosphere of the ocean. These tutorials will elevate your beach drawings to the next level, allowing you to create realistic and awe-inspiring coastal scenes.
Don’t forget to explore the Tips for Adding Color to Beach Artwork, where you will learn various techniques to add vibrancy and depth to your beach drawings. From selecting the right colors to shading and blending, these tips will help you bring your beach artwork to life with a pop of color.
Now that you have a comprehensive artistic guide to drawing beach landscapes at your fingertips, grab your favorite drawing tools and start creating your own beach masterpieces. Let your imagination soar and capture the serenity and beauty of the beach through your artwork. Happy drawing!