How to Draw a Skeleton – Drawing Turorials and Coloring Tips
Have you ever wanted to master the art of drawing skeletons? Whether you’re an aspiring artist or simply looking to refine your drawing skills, learning how to draw a skeleton is a great exercise that can help you understand human anatomy and improve your overall artistic abilities. But where do you start? What techniques and tools should you use? And how can you bring your skeleton drawing to life with color?
In this comprehensive tutorial, we will guide you step-by-step through the process of drawing a skeleton. From analyzing reference images to refining your sketch, from adding depth and details to exploring different coloring options, we will cover everything you need to know to create stunning skeleton artwork.
Key Takeaways:
- Learning how to draw a skeleton can help refine your drawing skills and improve your understanding of human anatomy.
- Start with a light pencil sketch of the skeleton, refining it and adding more details gradually.
- Use a combination of pencils and pens, along with good-quality paper and a reference image, for the best results.
- Pay attention to proportions and use basic shapes as a foundation for your skeleton drawing.
- Experiment with different coloring techniques and consider adding your own creative spin to make your skeleton artwork unique.
Have you ever wanted to learn how to draw a skeleton? You’re in luck! In this easy guide to drawing a skeleton, we’ll take you through the process step by step. Whether you’re a beginner or have some drawing experience, this tutorial will provide you with the necessary tips and guidance to create a realistic skeleton drawing.
To start, let’s break down the process into simple and easy-to-follow steps. By focusing on accuracy in proportion and scale, you’ll be able to draw a skeleton that truly captures its skeletal structure.
Begin by creating a light pencil sketch of the skeleton. Start with basic shapes and lines to outline the overall pose and structure. Don’t worry about adding too many details at this stage; the goal is to establish the main framework of the skeleton.
Once you’re satisfied with the initial sketch, gradually refine it by adding more details. Pay attention to the placement of the bones, joints, and important anatomical features. This will help ensure that your skeleton drawing remains true to its form.
As you progress through the tutorial, you’ll find yourself adding more intricate details and shading to enhance the depth and realism of your drawing. Take your time and observe any reference images or diagrams to guide your drawing process.
Remember, practice makes perfect! Don’t be discouraged if your first attempts don’t turn out exactly as you envisioned. Drawing is a skill that can be refined over time, so keep practicing and experimenting with different techniques.
Lastly, have fun and let your creativity shine through. There’s no right or wrong way to draw a skeleton, so feel free to add your own personal style and artistic flair. Experiment with different poses, perspectives, or even incorporate other elements to give your skeleton drawing a unique touch.
“Drawing a skeleton is not just about capturing its form; it’s about capturing its essence.”
Achieving Proportional Accuracy
When drawing a skeleton, one of the key challenges is accurately depicting its proportions. The human skeleton has a unique balance and structure that must be carefully observed.
Here are a few tips to help you achieve proportional accuracy in your skeleton drawing:
- Start with a basic stick figure: Before adding the skeletal details, sketch a simple stick figure to establish the overall pose and proportions. This will serve as a guide for the placement of the bones.
- Use reference images: Have a reference image or a skeleton diagram handy to ensure accurate placement and alignment of the bones. Pay attention to the angles, lengths, and positions of each bone.
- Break it down into sections: Instead of focusing on the entire skeleton at once, break it down into smaller sections. Draw the bones in groups, such as the arm bones or leg bones, and gradually connect them to form the complete skeleton.
- Compare and adjust: Continuously compare your drawing to the reference image or diagram to identify any discrepancies. Make adjustments as necessary to maintain accurate proportions.
By following these tips and practicing regularly, you’ll improve your ability to draw a skeleton with proportional accuracy and bring it to life on paper.
| Beginner Skeleton Drawing Tips |
|---|
| Start with a light pencil sketch using basic shapes and lines. |
| Gradually add more details and refine the skeleton structure. |
| Use reference images or diagrams to guide your drawing process. |
| Pay attention to accurate proportions and skeletal alignment. |
| Experiment with shading techniques to create depth and realism. |
| Don’t be afraid to add your own artistic flair and personal style. |
Remember, drawing a skeleton is a creative process that allows you to explore human anatomy and express your artistic vision. Enjoy the journey and embrace the opportunity to bring a skeleton to life through your drawings.
Necessary Materials
To create a skeleton drawing, you will need the following necessary materials:
- Pencils: Pencils of different grades, such as HB, 2B, and 4B, will allow you to create various shades and tones in your drawing.
- Ballpoint Pen: A ballpoint pen with a medium tip is ideal for adding precise details and outlines to your skeleton drawing.
- Eraser: An eraser will come in handy for correcting any mistakes or smudges during the drawing process.
- Sharpener: A sharpener will keep your pencils in tip-top shape, ensuring smooth and precise lines.
- Good-Quality Paper: Use a high-quality drawing paper with a smooth surface to achieve the best results in your skeleton drawing.
- Reference Image: Having a reference image of a skeleton will help you understand the bone structure and proportions while drawing.
These materials are essential to facilitate your drawing process and ensure the best outcome for your skeleton artwork. Now, let’s move on to the step-by-step instructions on how to draw a skeleton!

An Example of the Necessary Materials for Drawing a Skeleton
| Materials | Description |
|---|---|
| Pencils | Different grades for shading and sketching |
| Ballpoint Pen | For adding details and outlines |
| Eraser | To correct mistakes and smudges |
| Sharpener | To keep your pencils sharp |
| Good-Quality Paper | Provides a smooth drawing surface |
| Reference Image | Helps understand bone structure and proportions |
Step-by-Step Instructions on How to Draw a Skeleton
When it comes to drawing a skeleton, a step-by-step approach is key to achieving accurate proportions and capturing the intricate details. Let’s dive into the process and uncover the techniques that will help you create a stunning skeleton drawing.
Analyzing the Reference Image
Begin by carefully studying the reference image you have chosen for your skeleton drawing. Pay close attention to the angle and position of the skeleton, as well as the direction of the joints, curves, and angles of the bones. This analysis will serve as your foundation and guide throughout the drawing process.
Making a Light Pencil Sketch
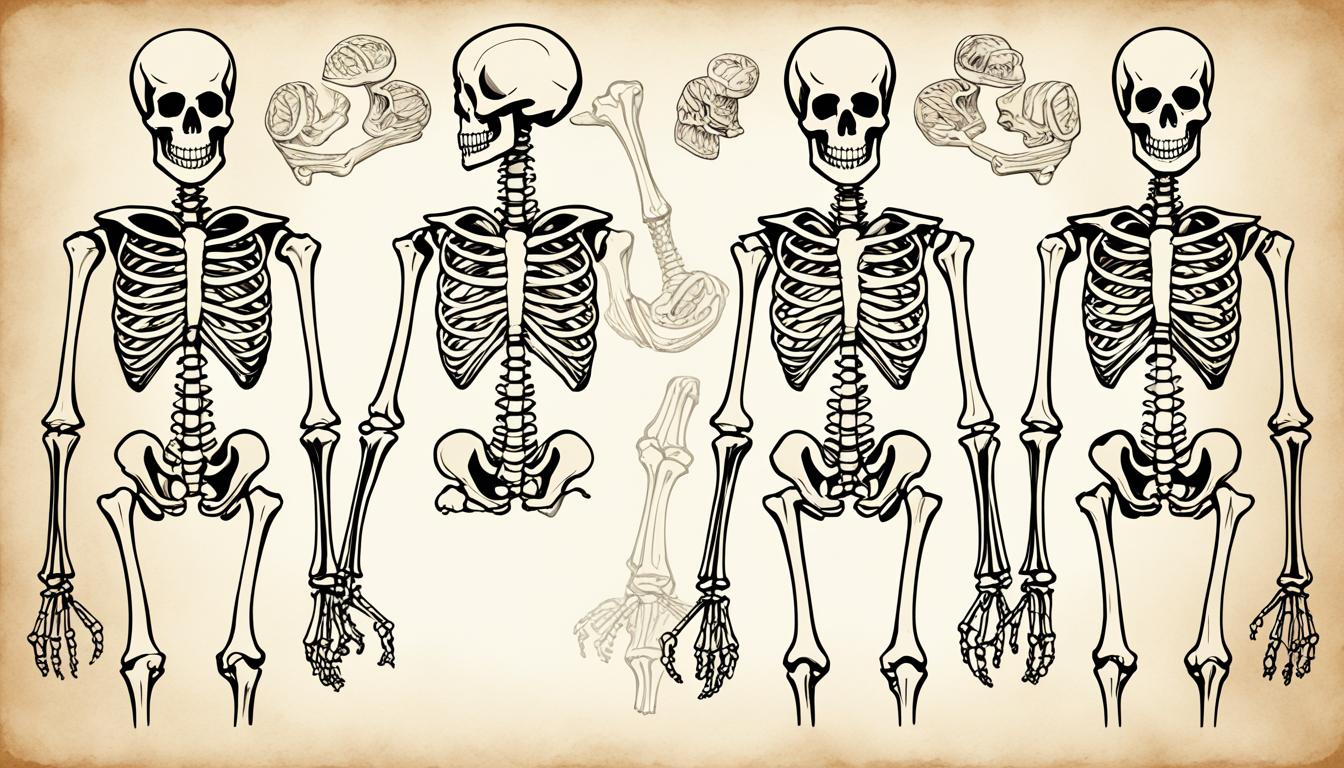
Start by lightly sketching the basic shapes and lines that form the skeleton’s structure. Use simple geometric shapes to represent the major bones, such as circles for the skull and joints, rectangles for the ribs and limbs, and ovals for the pelvis. This initial sketch will help you establish the overall proportions and layout of the skeleton.
Remember to keep your lines light, as they are meant to be guidelines that will be refined and adjusted in later steps. This allows you to easily correct any mistakes or make necessary changes as you progress.

Refining the Sketch and Adding Details
Once you have the basic structure in place, it’s time to refine your sketch and add more details to your skeleton drawing. Begin by gradually erasing the unnecessary guidelines and smoothening out the outlines of the bones. Pay close attention to the curves and contours of the bones, ensuring they flow naturally and accurately represent the human skeleton.
Next, start adding smaller details, such as the ridges on the skull, the joints, and the variations in bone thickness. These details will bring depth and realism to your drawing. Remember to refer to your reference image frequently to ensure accuracy.
Drawing with Pens
Once you are satisfied with your refined pencil sketch, it’s time to make your skeleton drawing permanent by using pens. Switch to a fine-tip pen and carefully trace the outlines of the bones, emphasizing the darker areas and using thinner lines for lighter areas. This will give your skeleton drawing a clean and finished look.
Consider adding cross-hatching or stippling techniques to create shading and texture, especially in areas where the bones overlap or where shadows naturally occur. These techniques will add depth and dimension to your skeleton drawing.
Tips for Accurately Drawing Skeleton Proportions
- Pay attention to the lengths and sizes of bones in relation to each other; this will help ensure accurate proportions in your skeleton drawing.
- Use reference lines and measurements, such as the head-to-body ratio, to maintain consistency throughout your drawing.
- Study real anatomical diagrams of skeletons to better understand the proportions and relationships between different bones.
- Practice drawing skeletons from various angles and in different poses to further develop your understanding of their proportions and anatomy.
By following these step-by-step instructions and implementing the tips and techniques provided, you’ll be on your way to creating realistic and accurate skeleton drawings.
Tips to Remember
Drawing a skeleton can be a challenging, yet rewarding artistic pursuit. To make the process easier and more enjoyable, here are some valuable tips and tricks:
- Start with light sketch lines: Begin by lightly sketching the basic layout of the skeleton. This preliminary step allows you to establish the overall proportions and positioning without committing to precise details.
- Use basic shapes: Simplify the complexity of the skeleton by breaking it down into basic geometric shapes. This approach helps in constructing the body’s structure accurately and provides a solid foundation for adding more intricate details later on.
- Study real skeleton diagrams: Refer to real skeleton diagrams or anatomy resources to better understand the underlying structure and proportions. Observing the skeletal system from different angles can help you capture the correct anatomical details in your drawings.
- Add props to enhance composition: Consider incorporating props or objects to complement your skeleton drawing. Props such as hats, musical instruments, or other accessories can add visual interest and create a captivating composition.
- Practice regularly and take breaks: Like any skill, drawing requires practice. Set aside dedicated time to practice sketching skeletons, allowing yourself breaks to maintain focus and fresh eyes. Consistent practice will enable you to improve and refine your drawing technique over time.
By following these tips, you’ll gain confidence in drawing skeletons and enhance your artistic abilities. Remember, each drawing is a learning opportunity, so embrace the process and have fun exploring the fascinating world of skeletal art!
Adding Depth and Details
Adding depth and details to your skeleton drawing is essential for creating realistic and visually captivating artwork. By carefully considering composition strategies and refining the skeleton structure, you can make your drawing come to life. Here are some tips to help you enhance the depth and details of your skeleton art:
1. Shading and Refining
One effective strategy is to add shading to your skeleton drawing. Pay attention to areas with overlapping bones or joints and use light and dark shading to create depth. Additionally, refine the skeleton structure by adding smaller lines for the vertebrae, collarbones, hands, and joints. This attention to detail will help make your drawing more accurate and lifelike.
2. Focus on Facial Details
The face is an important part of any skeleton drawing. Pay special attention to shading around the eye sockets and nasal cavity to create a more realistic appearance. Look closely at reference images to understand the subtle details and contours of the facial features.
3. Use Props and Backgrounds
To enhance the composition of your skeleton art, consider adding props or incorporating a background. Props can include objects such as hats, musical instruments, or flowers, which can add personality and interest to your drawing. Backgrounds, whether simple or elaborate, can help establish a scene and create a story around your skeleton.
By incorporating these strategies and paying attention to the details, you can create a stunning and convincing skeleton drawing. Remember to practice regularly and experiment with different techniques to find your own unique style.

Coloring a Skeleton Drawing
Coloring a skeleton drawing can add a unique touch to your artwork. By experimenting with different colors and shading techniques, you can enhance the ghostly and skeletal appearance, bringing your skeleton to life on paper.
When choosing colors for your skeleton, consider using dark or muted tones to create an eerie and haunting effect. Shades of gray, black, and deep blues can help emphasize the bones and add a sense of mystery. These colors can also help create a contrast against the background, making the skeleton stand out.
To add depth and dimension to your skeleton, consider adding a translucent effect. By lightly shading the areas surrounding the skeleton, you can create the illusion of depth and make the bones appear more three-dimensional. This technique can make your skeleton drawing more visually interesting and realistic.
Experiment with different shading techniques, such as cross-hatching or stippling, to create texture and enhance the details of the skeleton. Pay attention to the shadows and highlights, as they can add depth and make the skeleton look more dynamic.
Remember that the choice of colors and shading techniques will depend on your desired artistic style and the overall mood you want to create. Whether you prefer a spooky Halloween theme or a more traditional approach, there are endless possibilities to explore.
Recommended Coloring Techniques:
- Use dark or muted colors to enhance the ghostly and skeletal appearance.
- Add a translucent effect by lightly shading the areas surrounding the skeleton.
- Experiment with different shading techniques, such as cross-hatching or stippling, to create texture and enhance the details.
- Pay attention to shadows and highlights to add depth and make the skeleton look more dynamic.
By following these best practices for coloring a skeleton drawing, you can take your artwork to the next level and create a visually stunning and spooky masterpiece.

Adding Your Own Creative Spin
Learning how to draw a skeleton is not only an exercise in improving your artistic skills but also an opportunity to infuse your own creativity and personalization into your artwork. By adding your own creative spin, you can turn a simple skeleton drawing into a unique representation of your individual artistic expression.
One way to personalize your skeleton artwork is by experimenting with different poses. Explore dynamic and expressive poses that convey movement and emotion. Whether it’s a dancing skeleton or a relaxed pose, let your imagination guide you in creating a composition that captures the essence of the subject.
Props are another great way to add personality to your skeleton drawing. Consider incorporating jack-o-lanterns, tombstones, or other Halloween elements to enhance the theme and create an intriguing atmosphere. These additional elements can help tell a story or set a specific mood.
Furthermore, don’t be afraid to explore different artistic styles. Skeleton drawings don’t have to be limited to a traditional representation. Experiment with different techniques and approaches, such as using bold lines or adding abstract elements. Push the boundaries of your creativity and discover a style that speaks to you.
Remember, the goal is to make your skeleton artwork stand out and reflect your own unique vision. Embrace the freedom of creativity and enjoy the process of personalizing your skeleton drawings.

Example of Personalized Skeleton Drawing:
To inspire your creativity, here’s an example of a personalized skeleton drawing. This drawing incorporates a whimsical pose with the skeleton holding a bouquet of colorful flowers. The addition of the flowers adds a touch of beauty and vitality to the otherwise skeletal figure, creating an interesting contrast.
“I wanted to create a skeleton drawing that showcased both the eerie and the beautiful. By adding the bouquet of flowers, I wanted to symbolize the transient nature of life and the beauty that can be found even in the most unlikely places. The juxtaposition of life and death creates a hauntingly captivating image.”
So don’t be afraid to let your imagination run wild and infuse your skeleton drawings with your own unique creative spin. Explore different poses, add props, and experiment with artistic styles to create stunning and personalized skeleton artwork that truly reflects who you are as an artist.
Conclusion
Drawing a skeleton can be a challenging but rewarding artistic endeavor. Throughout this tutorial, we have provided step-by-step instructions and helpful tips to guide you in creating stunning skeleton artwork. By following these techniques and practicing regularly, you can develop your drawing skills and confidently bring skeletons to life on paper.
Remember to start with a light pencil sketch, gradually adding more details and refining the structure. Pay attention to the proportions and study real skeleton diagrams to ensure accuracy. Adding depth and details through shading will enhance the realism and visual appeal of your drawing. And don’t forget to unleash your creativity by personalizing your artwork and experimenting with different poses and themes.
With dedication and practice, you can master the art of drawing skeletons. So grab your pencils and pens, and embark on this artistic journey. We hope this tutorial has inspired you to explore the fascinating world of skeleton art and unleash your artistic potential. Now go and create your own unique and captivating skeleton drawings!


